Content Menu
● Introduction
● Getting Started with Apple Photos
>> Organizing Your Photos
>> Selecting Photos
● Creating Your Photo Book in Apple Photos
>> Starting Your Project
>> Choosing Your Book Format
>> Picking a Theme
>> Adding Your Photos
>> Arranging Your Layout
>> Adding Backgrounds and Borders
● Customizing Your Photo Book
>> Adding Text
>> Editing Photos
>> Previewing Your Book
● Printing Your Photo Book
>> Choosing a Printing Service
>> Placing Your Order
>> Shipping Options
● Tips for Creating an Impactful Photo Book
>> Tell a Story
>> Use White Space Wisely
>> Incorporate Special Touches
● Conclusion
● Frequently Asked Questions
>> 1. What is the best way to organize my photos before creating a photo book?
>> 2. Can I add text alongside my photos?
>> 3. What if I want more creative control over my photo layouts?
>> 4. How do I ensure my printed photo book looks professional?
>> 5. What alternatives exist if I want digital copies of my photo books?
Introduction
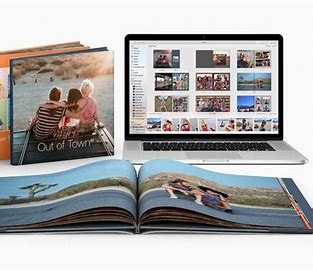
Creating a photo book is a wonderful way to preserve memories, celebrate milestones, and share experiences with family and friends. With Apple's suite of applications, particularly Photos and Pages, users can easily design and print beautiful photo books. This guide will walk you through the entire process of creating an engaging photo book using Apple's tools, from selecting photos to customizing layouts and printing your final product.

Getting Started with Apple Photos
Before diving into the creation process, it's essential to familiarize yourself with Apple Photos. This application serves as the foundation for organizing your images and selecting the best ones for your photo book.
Organizing Your Photos
- Create Albums: Start by creating albums in Apple Photos. Group photos by events, themes, or dates to make selection easier later on. For example, you might have separate albums for family vacations, birthdays, and holidays.
- Tagging and Rating: Use tags or ratings to mark your favorite photos. This will help you quickly identify which images you want to include in your book. Consider using a star rating system or color coding to indicate which photos are the best candidates for your project.
- Utilize Smart Albums: Smart Albums can automatically gather photos based on criteria you set, such as date ranges or keywords. This feature can save time when searching for specific images.
Selecting Photos
Once your photos are organized, the next step is selecting images for your photo book:
- Choose Meaningful Images: Focus on photos that tell a story or evoke emotions. Consider including a mix of candid shots, posed pictures, and scenic views. A well-rounded selection will engage readers more effectively.
- Limit Your Selection: Depending on the size of your photo book, aim for a manageable number of images. A good rule of thumb is to choose around 20-50 photos for a standard-sized book. This allows each image to shine without overwhelming the viewer.
- Consider Chronological Order: If your photo book chronicles a specific event or period, arranging images chronologically can enhance storytelling and provide a natural flow.
Creating Your Photo Book in Apple Photos
Apple Photos offers a straightforward way to create a photo book directly within the app.
Starting Your Project
To begin, open Apple Photos and follow these steps:
- Navigate to the File menu.
- Select Create, then click on Book. This action will prompt you to choose a format for your book.
Choosing Your Book Format
Apple provides several options for book formats:
- Hardcover Books: Available in various sizes such as 10"x10", 11"x8.5", and more. These are perfect for keepsakes that you want to last a lifetime.
- Softcover Books: These are typically less expensive and come in sizes like 8"x6" and 8"x8". They are great for casual photo collections or gifts.
- Custom Sizes: Some third-party services allow custom dimensions if you have specific design ideas in mind.
Select the format that best suits your needs and click on the Select button.
Picking a Theme
Apple Photos offers a variety of themes that dictate the layout and design of your photo book:
- Browse through available themes and select one that resonates with the mood of your photos. Themes can range from minimalist designs to vibrant layouts with decorative elements.
- You can preview how different themes will look with your selected images before making a final decision. Consider how each theme complements the colors and styles of your photographs.
Adding Your Photos
After selecting a theme, it's time to fill your book with images:
- Click on the Add Photos button located at the bottom right corner.
- You can drag and drop photos from your library into the designated placeholders in the book layout.
Arranging Your Layout
Once you have added your photos, you can start arranging them:
- Drag photos around to change their order.
- Use different layouts for each page by clicking on the Options button beneath each page to access layout settings. Experiment with full-page images versus collages to see what works best for each section of your book.
Adding Backgrounds and Borders
To enhance visual appeal, consider customizing backgrounds:
- Choose solid colors or patterns that complement your images.
- Add borders around photos for a polished look; this can help define each image within the layout.
Customizing Your Photo Book
Customization is key to making your photo book unique and personal.
Adding Text
Incorporating text can enhance storytelling within your photo book:
- Use text boxes provided in most templates to add captions, quotes, or descriptions.
- Choose fonts that match the theme of your book for consistency. Play with font sizes and styles to highlight significant moments or messages effectively.
Editing Photos
Before finalizing your book, consider editing your photos:
- Use built-in editing tools within Apple Photos to adjust brightness, contrast, or apply filters.
- Consistent editing across all images can create a cohesive look throughout the book. If you have multiple images from similar lighting conditions, applying similar edits can unify their appearance.
Previewing Your Book
After making all adjustments, preview your photo book:
- Double-click on any page to see it in full spread view.
- Check for any errors or layout issues before proceeding to print. Look out for typos in text boxes or misaligned images that might detract from the overall quality.

Printing Your Photo Book
Once satisfied with your design, it's time to print.
Choosing a Printing Service
Apple no longer offers direct printing services for photo books; however, you can use third-party services like Mimeo Photos or Motif:
- Download these apps from the Mac App Store.
- They integrate seamlessly with Apple Photos and offer various printing options tailored to different budgets and preferences.
Placing Your Order
Follow these steps to place an order through a third-party service:
- Select your preferred printing service from within Apple Photos.
- Follow prompts to finalize details such as cover type (glossy vs matte), paper quality (standard vs premium), and quantity (single copy vs multiple copies).
- Review pricing before confirming your order; some services may offer discounts for bulk orders or seasonal promotions.
Shipping Options
Consider shipping options based on urgency:
- Standard shipping is usually more economical but may take longer.
- Expedited shipping is available if you need your photo book quickly—ideal for last-minute gifts!
Tips for Creating an Impactful Photo Book
To ensure that your photo book stands out, consider these additional tips:
Tell a Story
Think about how each image contributes to an overarching narrative:
- Arrange photos in a way that guides readers through an experience—this could be chronological or thematic based on emotions or events.
Use White Space Wisely
Don't overcrowd pages with too many images or text:
- Allow ample white space around elements; this helps each component breathe and enhances overall aesthetics.
Incorporate Special Touches
Consider adding special touches like:
- Personalized dedications at the beginning or end of the book.
- A table of contents if you're covering multiple events or themes extensively.
Conclusion
Creating an apple photo book is an enjoyable process that allows you to showcase cherished memories creatively. By following these steps—from organizing photos in Apple Photos to customizing layouts in Pages—you can produce a stunning keepsake that tells your unique story. Whether it's for personal use or as a gift, a well-crafted photo book can be treasured for years to come.

Frequently Asked Questions
1. What is the best way to organize my photos before creating a photo book?
Organizing photos into albums based on events or themes is effective. Tagging favorites can also streamline selection during the creation process.
2. Can I add text alongside my photos?
Yes! Most templates allow you to add text boxes where you can include captions or stories related to the images.
3. What if I want more creative control over my photo layouts?
Using Apple Pages provides more flexibility than Apple Photos alone. You can create custom layouts with text and graphics using Pages' templates.
4. How do I ensure my printed photo book looks professional?
Make sure to edit all images consistently before adding them to your book. Choosing high-quality paper and cover options during printing also enhances professionalism.
5. What alternatives exist if I want digital copies of my photo books?
You can create PDF versions of your photo books using Apple Pages or other design software like Canva or Adobe InDesign for digital sharing.


