Content Menu
● Choose a Theme
>> Expanding on Themes
● Organize Your Photos
>> Utilizing Digital Tools
● Select the Best Photos
>> Editing Your Photos
● Design the Layout
>> Incorporating Design Principles
● Add Text and Captions
>> Creative Text Ideas
● Choose a Cover Design
>> Cover Material Options
● Review and Edit
>> Final Touches
● Print and Share
>> Digital Versions
● Conclusion
● Related Questions
>> 1. What are some popular themes for photo books?
>> 2. How do I choose which photos to include?
>> 3. What software can I use to design my photo book?
>> 4. How do I ensure my printed photos look good?
>> 5. Can I include text in my photo book?
● Citations:
Designing a photo book is an enriching experience that allows you to curate and preserve your cherished memories in a tangible format. Whether it's a personal keepsake, a gift for loved ones, or a professional portfolio, creating a photo book involves thoughtful planning and creativity. This comprehensive guide will walk you through the steps of designing a beautiful photo book that tells your unique story.

Choose a Theme
The first step in designing your photo book is to select a theme. A cohesive theme provides a narrative structure that guides your photo selection and layout decisions. Consider what the primary focus of your book will be:
- Personal milestones: Birthdays, graduations, weddings.
- Travel adventures: Documenting trips and experiences.
- Family albums: Capturing family gatherings and portraits.
- Hobbies or interests: Showcasing your passion for photography, cooking, or art.
Once you have defined your theme, it becomes easier to choose images that align with this central idea. A clear theme not only helps in organizing your photos but also sets the tone for the overall design and layout of the book.
Expanding on Themes
When choosing a theme, think about the emotions you want to evoke. For instance:
- Seasonal themes: Create a photo book that captures the essence of each season—spring flowers, summer vacations, autumn leaves, and winter holidays.
- Life events: Consider focusing on significant life events such as engagements, weddings, or the birth of a child. Each event can be documented with its own section within the book.
- Travel journeys: If you've traveled extensively, consider creating separate sections for each trip or destination. This allows for detailed storytelling about each location.
By narrowing down your theme, you can create a more focused narrative that resonates with viewers.
Organize Your Photos
Before diving into the design process, it's essential to organize your photos. This involves sorting through your digital or printed images and categorizing them based on your chosen theme. Here are some tips for effective organization:
- Create folders on your computer for different events or categories.
- Use cloud storage solutions to back up your photos and access them easily.
- Consider using software that allows tagging or rating images for quick retrieval.
By organizing your photos ahead of time, you streamline the design process and ensure that you can easily find the images you want to include.
Utilizing Digital Tools
In addition to physical organization methods, various digital tools can assist in managing your photo library:
- Photo management software: Applications like Adobe Lightroom or Google Photos help in organizing and editing photos efficiently. They allow you to tag images and create albums based on themes.
- Backup solutions: Regularly back up your organized photos using external hard drives or cloud services like Dropbox or Google Drive to prevent loss.
Having an organized photo library not only saves time during the design process but also ensures that you have access to all necessary images when needed.
Select the Best Photos
When it comes to selecting photos for your book, quality is paramount. Aim for high-resolution images that are well-composed and capture significant moments. Here are some guidelines:
- Limit yourself to the best images—too many similar photos can dilute the impact of your book.
- Choose a mix of wide shots, close-ups, and candid moments to create visual variety.
- Ensure that each selected photo contributes meaningfully to the overall narrative of the book.
This careful selection process helps maintain the viewer's interest and emphasizes the most important moments.
Editing Your Photos
Before finalizing your selections, consider editing your photos to enhance their quality:
- Use editing software like Adobe Photoshop or Lightroom to adjust brightness, contrast, and color balance.
- Crop images thoughtfully to focus on key subjects while eliminating distractions in the background.
- Apply filters judiciously; while they can enhance aesthetics, overusing them may detract from the original beauty of the photographs.
Editing not only improves visual appeal but also ensures consistency in style across all images in your photo book.

Design the Layout
The layout of your photo book plays a crucial role in how the story unfolds on each page. A well-thought-out layout enhances visual appeal and guides readers through your narrative. Consider these aspects:
- Page flow: Arrange photos in a way that creates a natural progression from one page to the next. This can be chronological or thematic.
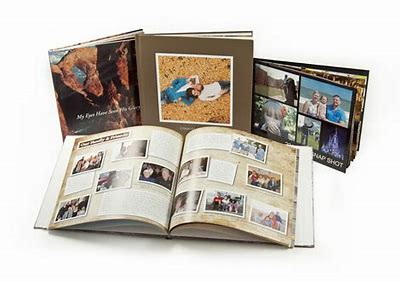
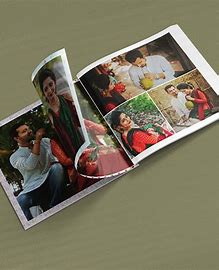
- Mixing layouts: Use different layouts for various sections—some pages can feature full-page images while others can have collages or smaller groupings of photos.
- White space: Don't overcrowd pages with images; leave some areas blank to allow each photo room to breathe. This also provides space for captions or notes.
Experiment with different layouts until you find one that feels balanced and engaging.
Incorporating Design Principles
Applying basic design principles can elevate your photo book's aesthetic:
- Alignment: Ensure elements are aligned properly; this creates a sense of order and professionalism.
- Contrast: Use contrasting colors between text and background for readability. Dark text on a light background is typically easier to read.
- Repetition: Maintain consistency in font styles and colors throughout the book to create cohesion.
By incorporating these design principles, you enhance not only the visual appeal but also the overall user experience when flipping through your photo book.
Add Text and Captions
Incorporating text into your photo book can significantly enhance its storytelling aspect. Captions provide context and personal anecdotes related to the photos. Here are some tips for adding text effectively:
- Keep captions concise but informative—aim for clarity without overwhelming the reader.
- Use different font styles and sizes to create visual hierarchy; this helps distinguish between headings, captions, and body text.
- Consider including an introduction page or section summaries that explain what readers can expect in each part of the book.
Text should complement rather than compete with images, so pay attention to placement and readability.
Creative Text Ideas
Beyond simple captions, consider these creative text ideas:
- Quotes: Include meaningful quotes related to family, travel experiences, or personal reflections that resonate with specific images.
- Stories: Share short anecdotes about what was happening during particular moments captured in photographs—this adds depth and personal connection.
- Date stamps: Adding dates helps contextualize memories within timeframes, making it easier for viewers to remember when events occurred.
Incorporating thoughtful text enriches the viewer's experience by providing context and emotional resonance alongside visuals.
Choose a Cover Design
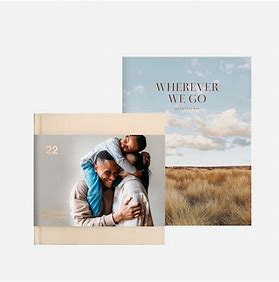
The cover of your photo book is the first impression readers will have, so it should be eye-catching and representative of the content inside. When designing your cover:
- Select a standout image that encapsulates the theme of your book.
- Include a title that reflects the essence of the collection; consider adding a subtitle if necessary.
- Ensure that the cover design is consistent with the overall aesthetic of the interior pages.
A well-designed cover entices viewers to open the book and explore its contents further.
Cover Material Options
When selecting materials for printing covers:
- Hardcover vs. Softcover: Hardcover options provide durability while softcover options are often lighter and more affordable.
- Finish types: Glossy finishes enhance colors but may reflect light; matte finishes reduce glare but may show fingerprints more easily.
Choosing high-quality materials not only enhances aesthetics but also ensures longevity for preserving memories over time.
Review and Edit
Before finalizing your photo book, take time to review each page meticulously. Look for any errors in text or image placement, ensuring everything aligns with your vision. Here are some steps for effective editing:
- Check for spelling mistakes or grammatical errors in captions.
- Ensure all images are correctly placed and formatted—no important details should be cropped out unintentionally.
- Seek feedback from friends or family; fresh eyes can catch mistakes you might overlook.
A thorough review process ensures that your final product is polished and professional.
Final Touches
As part of this review process:
- Make sure there's consistency in font sizes across similar sections.
- Verify color consistency throughout—if using specific colors for headings or backgrounds, ensure they match across all pages.
Taking these additional steps guarantees that every detail aligns perfectly before printing begins.
Print and Share
Once you're satisfied with your design, it's time to print your photo book. Choose a reputable printing service known for high-quality materials. Consider factors such as paper type, binding options, and print resolution when making your choice. After printing:
- Share copies with friends and family as gifts or keepsakes.
- Use it as part of a professional portfolio if applicable—showcasing your work in print can leave a lasting impression.
Creating a photo book is not just about preserving memories; it's also about sharing experiences with others.
Digital Versions
In addition to printed copies:
- Consider creating digital versions of your photo book using PDF formats or e-book formats like EPUB. This allows easy sharing via email or social media platforms.
- Digital versions can also be interactive—consider adding links within digital books that lead viewers back to online galleries or related content online.
Offering both printed and digital formats expands accessibility while catering to different preferences among viewers.
Conclusion
Designing a photo book is an enjoyable project that allows you to express creativity while preserving memories in an artistic way. By following these steps—from choosing a theme to selecting photos, designing layouts, adding text, reviewing edits, printing options—you can create a beautiful keepsake that tells your story. Whether it's for personal enjoyment or professional presentation, a well-crafted photo book serves as a testament to life's special moments.

Related Questions
1. What are some popular themes for photo books?
Popular themes include travel adventures, family gatherings, weddings, special events like anniversaries or graduations, hobbies such as cooking or sports photography.
2. How do I choose which photos to include?
Focus on high-quality images that capture significant moments related to your theme. Avoid duplicates and select a variety of shots to maintain interest throughout the book.
3. What software can I use to design my photo book?
Many users prefer software like Adobe InDesign or online platforms such as Shutterfly, Mixbook, or Blurb which provide user-friendly templates and editing tools.
4. How do I ensure my printed photos look good?
Use high-resolution images (at least 300 dpi) when selecting photos for print. Additionally, review color settings during editing to ensure accurate representation in print.
5. Can I include text in my photo book?
Yes! Adding captions or short stories enhances storytelling within your photo book. Just ensure they complement rather than distract from the images themselves.
Citations:
[1] https://www.theschoolofphotography.com/tutorials/how-to-create-a-photography-book
[2] https://www.blurb.com/blog/professional-photo-book-design-tips-for-creatives/
[3] https://www.bobbooks.co.uk/blog/20-tips-for-designing-a-photo-book
[4] https://www.shutterfly.com/ideas/how-to-make-the-perfect-photo-book/
[5] https://www.papier.com/us/thefold/articles/how-to-create-a-photo-book
[6] https://www.blurb.com/blog/make-great-photo-book/
[7] https://www.mixbook.com/inspiration/how-to-make-a-photo-book


