Content Menu
● Materials Needed
● Step-by-Step Instructions
>> Step 1: Choose Your Wrapping Paper
>> Step 2: Measure and Cut the Paper
>> Step 3: Create the Base of the Bag
>> Step 4: Add Handles (Optional)
>> Step 5: Decorate Your Gift Bag
>> Step 6: Fill Your Gift Bag
>> Step 7: Final Touches
● Tips for Success
● Creative Variations
>> Origami Gift Bags
>> Reusable Fabric Bags
>> Themed Gift Bags
● Conclusion
● Frequently Asked Questions
>> 1. Can I use any type of wrapping paper?
>> 2. How do I make my gift bag more durable?
>> 3. What if I don't have a hole punch?
>> 4. Can I use other materials besides string for handles?
>> 5. How can I personalize my gift bag?
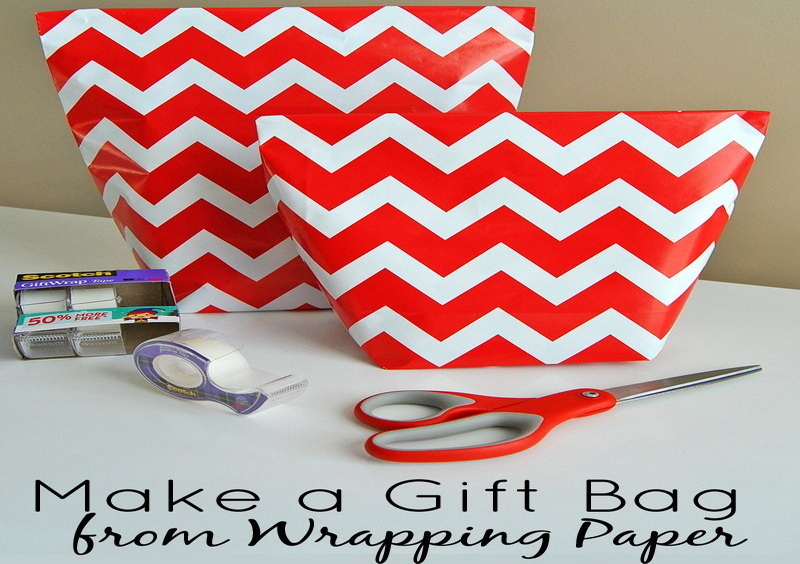
Making a gift bag from wrapping paper is a creative and eco-friendly way to present your gifts. Whether you are preparing for a birthday, holiday, or any special occasion, crafting your own gift bag can add a personal touch that store-bought bags often lack. This article will guide you through the process step-by-step, offering tips and ideas to enhance your gift-giving experience.

Materials Needed
Before you start making your gift bag, gather the following materials:
- Wrapping paper (any design of your choice)
- Scissors
- Tape or glue
- Ruler
- Pencil
- String or ribbon (optional)
- Hole punch (optional)
- Decorative elements (stickers, markers, etc.)
- A flat surface for working
Having these materials ready will streamline the process and make it easier to create a beautiful gift bag.
Step-by-Step Instructions
Step 1: Choose Your Wrapping Paper
The first step in making a gift bag is selecting the wrapping paper. Choose a design that suits the occasion and the recipient's taste. You can opt for festive patterns for holidays, floral designs for birthdays, or even solid colors for a more elegant look. Ensure the wrapping paper is sturdy enough to hold the weight of the gift.
Consider using recycled wrapping paper or fabric scraps to make your gift bag more eco-friendly. This not only reduces waste but also gives your bag a unique character.
Step 2: Measure and Cut the Paper
Once you have selected your wrapping paper, it's time to measure and cut it.
1. Determine the Size of Your Gift: Measure the dimensions of the gift you want to put inside the bag. A good rule of thumb is to add about 2 inches to each side for ease of wrapping.
2. Cut the Paper: Using a ruler and pencil, mark out the dimensions on the wrapping paper. Cut out a rectangular piece of paper based on these measurements. For example, if your gift is 6 inches wide, 4 inches tall, and 2 inches deep, you might cut a piece that is 12 inches wide by 10 inches tall.
Step 3: Create the Base of the Bag
To form the base of your gift bag, follow these steps:
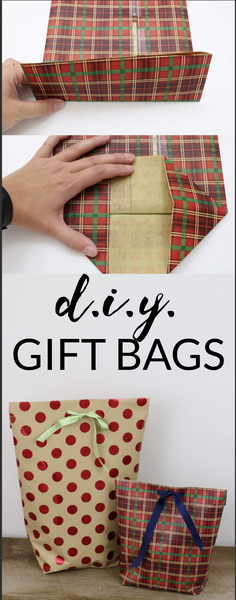
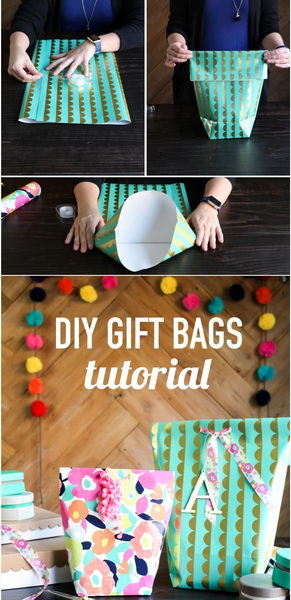
1. Fold the Paper: Take your rectangular piece of wrapping paper and fold it in half vertically, ensuring that the design is on the inside.
2. Seal the Sides: Use tape or glue to seal the sides of the folded paper together. Make sure it's secure so that it can hold your gift without falling apart.
3. Create the Bottom: To form the bottom of the bag, open up one end of the folded paper and push in the corners to create flaps. Fold these flaps down and secure them with tape or glue.
Step 4: Add Handles (Optional)
If you'd like your gift bag to have handles for easy carrying, you can add them using string or ribbon.
1. Punch Holes: Use a hole punch to create two holes on opposite sides of the top edge of your gift bag.
2. Insert String or Ribbon: Cut two equal lengths of string or ribbon and thread them through each hole from inside to outside. Tie knots on both ends to secure them in place.
Step 5: Decorate Your Gift Bag
To make your gift bag even more special, consider decorating it:
- Add Stickers or Stamps: Personalize your bag with stickers or stamps that match your theme.
- Draw Designs: Use markers or colored pencils to draw designs on plain wrapping paper.
- Attach Gift Tags: Create a matching gift tag using leftover wrapping paper scraps. Write a heartfelt message on it and attach it to the handle with string or tape.
Step 6: Fill Your Gift Bag
Now that your gift bag is complete, it's time to fill it with your chosen gift. Gently place your item inside, ensuring it fits comfortably without putting too much pressure on any seams.
Step 7: Final Touches
Before presenting your gift, take a moment to inspect your creation:
- Ensure all seams are securely taped.
- Adjust any decorations as needed.
- Fluff out any creases in the wrapping paper for a polished look.
Tips for Success
Creating a gift bag from wrapping paper can be an enjoyable experience if you keep these tips in mind:
- Practice Makes Perfect: If this is your first time making a gift bag, practice with scrap pieces of paper until you feel comfortable with the process.
- Be Creative: Don't hesitate to experiment with different shapes and sizes. You can make small bags for jewelry or larger ones for books and toys.
- Use Recycled Materials: Consider using old wrapping paper or other recyclable materials to create unique designs while being environmentally friendly.
Creative Variations
While making a standard rectangular gift bag is simple and effective, there are numerous creative variations you can explore:

Origami Gift Bags
Origami techniques can be used to create intricate designs that add an artistic flair to your gifts. Origami bags are made without tape or glue; instead, they rely solely on folds which can be both fun and challenging.
1. Start with a square piece of wrapping paper.
2. Follow origami instructions specific to creating bags; many tutorials are available online that guide you through different styles like pleated bags or box bags.
Reusable Fabric Bags
For an even more sustainable option, consider making reusable fabric bags instead of paper ones. This method involves sewing fabric pieces together but results in durable bags that can be used multiple times.
1. Choose fabric that matches your aesthetic.
2. Cut pieces similar in size to those used for paper bags.
3. Sew them together using simple straight stitches along the edges.
4. Add handles made from fabric strips or ribbon as desired.
Themed Gift Bags
Creating themed gift bags can elevate any occasion:
- For birthdays, use bright colors and fun patterns.
- For holidays like Christmas or Halloween, select themed wrapping papers featuring relevant motifs.
- For baby showers, pastel colors and cute animal designs work wonderfully.
Conclusion
Making a gift bag from wrapping paper is not only an enjoyable craft but also an excellent way to personalize your gifts while being sustainable. With just a few materials and some creativity, you can create beautiful bags that reflect both your style and thoughtfulness towards the recipient. This simple project allows you to express yourself while ensuring that every gift feels special.
By following these steps and tips, anyone can create stunning gift bags tailored specifically for their gifts—adding an extra layer of care and consideration that recipients will surely appreciate.

Frequently Asked Questions
1. Can I use any type of wrapping paper?
Yes, you can use any type of wrapping paper as long as it is sturdy enough to hold your gift.
2. How do I make my gift bag more durable?
To make your gift bag more durable, use thicker wrapping paper and reinforce seams with extra tape or glue.
3. What if I don't have a hole punch?
If you don't have a hole punch, you can simply cut small slits in the top edge of the bag where you want to insert handles.
4. Can I use other materials besides string for handles?
Absolutely! You can use ribbon, twine, or even strips of fabric as handles for your gift bag.
5. How can I personalize my gift bag?
You can personalize your gift bag by adding decorations such as stickers, drawings, or custom messages on tags attached to the handles.


