Content Menu
● Materials Needed
● Step-by-Step Instructions
>> Step 1: Measure and Cut Your Paper
>> Step 2: Create the Box Base
>> Step 3: Create the Box Lid
>> Step 4: Decorate Your Gift Box
● Creative Ideas for Customizing Your Gift Box
● Conclusion
● Frequently Asked Questions
>> 1. What type of paper is best for making gift boxes?
>> 2. Can I make larger boxes using this method?
>> 3. How do I ensure my box stays together?
>> 4. Are there any alternatives if I don't have decorative paper?
>> 5. Can I make boxes in different shapes?
Creating a paper gift box is a delightful and rewarding craft that adds a personal touch to your gift-giving experience. Whether you are preparing for a birthday, holiday, or special occasion, a handmade gift box can elevate the presentation of your gift and show the recipient that you care. In this guide, we will explore various methods to create beautiful paper gift boxes, including materials needed, step-by-step instructions, and creative ideas to customize your boxes.

Materials Needed
Before diving into the crafting process, it is essential to gather all the materials you will need. Here is a list of items that will help you create your paper gift box:
- Paper: You can use various types of paper such as cardstock, scrapbook paper, wrapping paper, or even recycled paper. Choose a design that matches the occasion or the personality of the recipient.
- Scissors: A sharp pair of scissors is necessary for cutting the paper accurately.
- Ruler: A ruler will help you measure and create straight lines for folding.
- Pencil: Use a pencil to mark measurements on the paper before cutting.
- Glue or Tape: Depending on your preference, you can use glue or double-sided tape to secure the edges of the box.
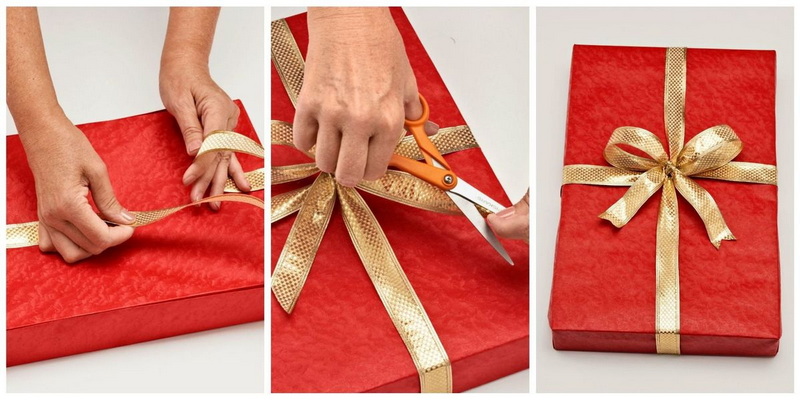
- Decorative Items: Consider using ribbons, stickers, stamps, or other embellishments to personalize your gift box.
Step-by-Step Instructions
Now that you have gathered your materials, let's go through the steps to create a simple square paper gift box. This method can be adapted for different sizes and shapes based on your needs.
Step 1: Measure and Cut Your Paper
1. Determine the Size of Your Box: Decide how large you want your gift box to be. A common size for a small gift box is 6 inches by 6 inches.
2. Cut Your Paper: For a square box, you will need two squares of paper—one for the top and one for the bottom. If you are making a 6-inch box, cut two squares measuring 6 inches by 6 inches.
Step 2: Create the Box Base
1. Fold Each Square: Take one of the squares and fold it in half diagonally from corner to corner. Unfold it and repeat with the other diagonal.
2. Fold in Half Horizontally and Vertically: Fold the square in half horizontally and then vertically. Unfold it again. You should now have creases forming an "X" pattern on your square.
3. Create Flaps: Fold each corner of the square towards the center crease where all folds intersect. This will create four triangular flaps at each corner.
4. Secure the Flaps: Apply glue or tape to hold these flaps down against the center of the box base. This will form the bottom part of your gift box.

Step 3: Create the Box Lid
1. Repeat Steps for Lid: Take the second square and repeat steps one through four to create the lid of your gift box. However, make sure that this square is slightly larger than the base square so that it fits over it comfortably.
2. Adjust Size if Necessary: If you find that your lid is too tight or too loose, adjust by trimming or adding extra folds until it fits just right.
Step 4: Decorate Your Gift Box
1. Personalize Your Box: Now comes the fun part—decorating! Use ribbons to tie around the box or stickers to embellish it further. You can also use stamps or markers to write messages on it.
2. Add a Gift Tag: Consider attaching a small gift tag with a personal message for an extra special touch.
Creative Ideas for Customizing Your Gift Box
There are countless ways to customize your paper gift boxes beyond simple decoration. Here are some creative ideas:
- Themed Boxes: Choose paper that reflects a specific theme such as holidays, birthdays, or seasons.
- Layered Designs: Use multiple layers of different colored papers to create depth and interest in your design.
- Interactive Elements: Add small compartments inside your box for multiple gifts or surprises.
- Unique Shapes: Experiment with different shapes like hexagons or hearts instead of traditional squares.
- Upcycled Materials: Use old maps, newspapers, or magazines to create eco-friendly gift boxes with character.
Conclusion
Making a paper gift box is not only an enjoyable craft but also an excellent way to add a personal touch to your gifts. With just some basic materials and creativity, anyone can create beautiful boxes suitable for any occasion. Whether you choose simple designs or elaborate decorations, each handmade box carries a unique charm that store-bought options cannot replicate. By following this guide and experimenting with different techniques and styles, you can master the art of creating paper gift boxes that will delight anyone who receives them.

Frequently Asked Questions
1. What type of paper is best for making gift boxes?
The best type of paper depends on your design preference; however, cardstock is often recommended due to its sturdiness and ability to hold its shape well.
2. Can I make larger boxes using this method?
Yes! Simply adjust the size of your initial squares according to how large you want your final box to be while ensuring that both pieces (base and lid) are proportionate.
3. How do I ensure my box stays together?
Using strong adhesive like craft glue or double-sided tape at all corners will help keep your box securely closed during use.
4. Are there any alternatives if I don't have decorative paper?
You can use plain printer paper and decorate it with drawings, stamps, or stickers after constructing your box for a personalized touch.
5. Can I make boxes in different shapes?
Absolutely! While this guide focuses on square boxes, you can adapt these instructions for various shapes by altering measurements and folding techniques accordingly.


