Content Menu
● Gather Your Materials
● Plan Your Layout
● Create Your Pages
>> Adding Text and Captions
● Assemble Your Book Block
● Choose Your Binding Method
>> Saddle Stitch Binding
>> Japanese Stab Binding
>> Spiral Binding
>> Hardcover Binding
● Create Your Cover
>> Personalizing Your Cover
● Final Assembly
● Add Finishing Touches
● Maintenance and Care
● Sharing Your Creation
● Conclusion
● Frequently Asked Questions
>> 1. What type of paper should I use for my photo book?
>> 2. How do I choose a binding method?
>> 3. Can I include non-photo items in my album?
>> 4. What tools do I need for making a photo book?
>> 5. How can I personalize my photo book?
● Citations:
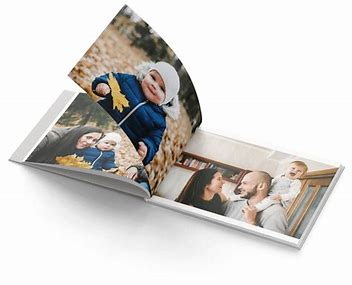
Creating a handmade photo book is a rewarding project that allows you to preserve memories in a personalized and artistic way. This guide will walk you through the entire process, from selecting materials to binding your finished book. Whether you're making a gift for someone special or creating a keepsake for yourself, this step-by-step approach will help you craft a beautiful photo book.

Gather Your Materials
Before you start, gather all the necessary materials. Here's what you will need:
- Photos: Choose the images you want to include in your book. You can print these at home or at a local print shop.
- Paper: Select high-quality paper for the pages of your book. Options include cardstock, watercolor paper, or specialty photo paper.
- Cover Material: This can be fabric, cardboard, or decorative paper. Choose something sturdy that reflects your style.
- Binding Supplies: Depending on your chosen binding method, you may need thread, glue, staples, or rings.
- Tools: Have scissors, a craft knife, a ruler, a cutting mat, and a hole punch ready.
Plan Your Layout
Decide on the layout of your photo book before assembling it. Consider the following:
- Theme: Will it be a travel album, a family scrapbook, or perhaps a wedding memory book?
- Order of Photos: Arrange your photos in chronological order or by theme. This helps tell a story through your images.
- Page Design: Think about how much space each photo will occupy. Will you add captions or decorative elements?
Create Your Pages
Once you have your layout planned, it's time to create the individual pages:
- Cutting Pages: Use your ruler and craft knife to cut the pages to your desired size. Common sizes are 8x10 inches or 12x12 inches.
- Decorating Pages: Add embellishments like washi tape, stickers, or hand-drawn designs around your photos. You can also use watercolors or markers to create backgrounds.
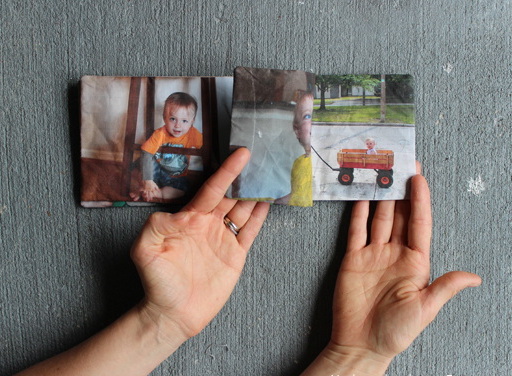
- Attaching Photos: Use glue sticks or double-sided tape to adhere photos to the pages. Ensure they are securely attached and aligned properly.
Adding Text and Captions
Consider including text on your pages to provide context for the images. This could be simple captions describing the event or more elaborate storytelling that captures the emotions of the moment. You can write directly on the page with pens or markers, or print out text on separate paper and glue it down.
Assemble Your Book Block
The book block is the collection of all your pages bound together. Here's how to create it:
- Stacking Pages: Align all your pages neatly and ensure they are in the correct order.
- Creating Spacers: If you want to add dimension for thicker items like postcards or memorabilia, consider adding spacers between some pages.
Choose Your Binding Method
There are several binding methods you can choose from based on your skill level and available materials:
Saddle Stitch Binding
This is one of the simplest methods:
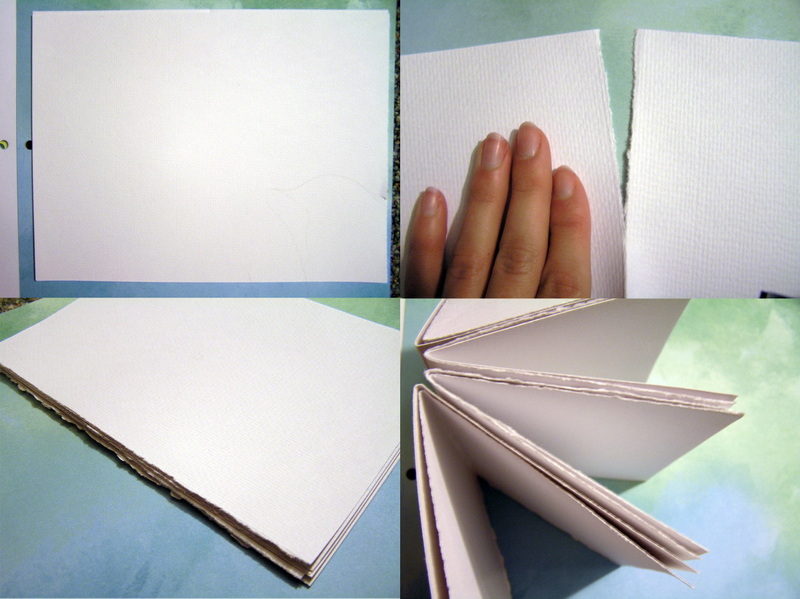
- Fold all pages in half.
- Stack them together and use a long needle and thread to sew through the fold.
- Tie off securely.
Japanese Stab Binding
This method is decorative and easy:
- Punch holes along one side of the stack.
- Use decorative thread to stitch through the holes in a pattern of your choice.
Spiral Binding
For a more professional look:
- Take your pages to a local print shop for spiral binding.
- This allows the book to lay flat when opened.
Hardcover Binding
For durability:
- Create covers from thick cardboard covered with fabric or decorative paper.
- Attach your pages using glue along the spine.

Create Your Cover
The cover is crucial as it protects your pages and adds aesthetic value:
- Cut two pieces of cardboard for the front and back covers.
- Cover them with fabric or decorative paper using glue.
- Attach the spine (a strip of cardboard) that connects both covers.
Personalizing Your Cover
To make your cover stand out even more, consider adding personalized touches such as:
- A title that reflects the theme of your photo book.
- Decorative elements like ribbons, buttons, or charms that match your overall design.
- A photograph on the cover itself for an eye-catching effect.
Final Assembly
Now that all components are ready:
- Attach the cover to the book block using glue along the spine.
- Ensure everything is aligned properly before pressing down firmly.
Add Finishing Touches
Once assembled:
- Decorate the cover with titles or embellishments that reflect the theme of your book.
- Consider adding an inscription inside for personalization.
Maintenance and Care
After completing your photo book, it's essential to take care of it properly:
- Store it in a cool, dry place away from direct sunlight to prevent fading and deterioration.
- If possible, keep it in an acid-free box or sleeve to protect it from dust and moisture.
- Handle it gently when flipping through pages to avoid tearing or damaging any elements you've added.
Sharing Your Creation
Once you've completed your handmade photo book, consider sharing it with friends and family:
- Host a small gathering where you can showcase your work and share stories behind each photo.
- Create digital versions by scanning each page if you want to share it online without compromising its physical integrity.
- Consider gifting copies of specific pages as prints for loved ones who might appreciate those memories too.
Conclusion
Making a handmade photo book is not only an enjoyable craft but also an excellent way to preserve cherished memories. By following these steps, you can create a unique keepsake that reflects your personality and creativity while telling a story through images and words.
The process encourages mindfulness as you reflect on each memory captured within those photographs while allowing you to express yourself artistically through design choices and layouts.

Frequently Asked Questions
1. What type of paper should I use for my photo book?
Use heavyweight paper such as cardstock or specialty photo paper for durability and quality presentation.
2. How do I choose a binding method?
Consider factors like ease of use, desired aesthetics, and how many pages you have when selecting a binding method.
3. Can I include non-photo items in my album?
Yes! You can include memorabilia like ticket stubs, postcards, and notes by using spacers or thicker pages.
4. What tools do I need for making a photo book?
Basic tools include scissors, craft knives, rulers, hole punches, and adhesives like glue sticks or double-sided tape.
5. How can I personalize my photo book?
Add captions, quotes, and decorative elements that reflect your style and enhance storytelling throughout the album.
Citations:
[1] https://blog.papercraftpanda.com/overview-how-to-make-a-handmade-photo-album-binding/
[2] https://365picturetoday.com/blog/creating-handmade-photo-book
[3] https://www.shutterfly.com/ideas/diy-photo-album/
[4] https://www.youtube.com/watch?v=LcsNphzQDB8
[5] https://www.craftynest.com/2020/11/simple-fabric-covered-photo-album/
[6] https://www.mixbook.com/inspiration/unique-photo-book-ideas
[7] https://www.milkbooks.com/photo-albums/handmade-photo-albums/
[8] https://www.paulpolitis.com/musings/handmade-photo-book-inkjet-prints-photo-chapbooks/
[9] https://fixthephoto.com/diy-photo-album-ideas.html
[10] https://www.artifactuprising.com/diy/photo-book-examples


