Content Menu
● Introduction
● Materials Needed
● Step-by-Step Guide to Making a Photo Flip Book
>> Select Your Photos
>> Edit and Print Your Photos
>> Cut Your Photos
>> Prepare the Pages
>> Arrange Your Photos
>> Attach the Photos
>> Create a Cover (Optional)
>> Bind Your Flip Book
>> Test Your Flip Book
>> Enjoy and Share!
● Tips for Enhancing Your Flip Book
>> Use Consistent Themes
>> Experiment with Layouts
>> Add Text
>> Decorate the Pages
>> Consider Animation Techniques
● Digital Flip Book Alternatives
● Conclusion
● Frequently Asked Questions
>> 1. What type of photos work best for flip books?
>> 2. Can I make a digital flip book?
>> 3. How do I ensure my printed photos are high quality?
>> 4. What is the best way to bind my flip book?
>> 5. How many pages should my flip book have?
● Citations:
Introduction
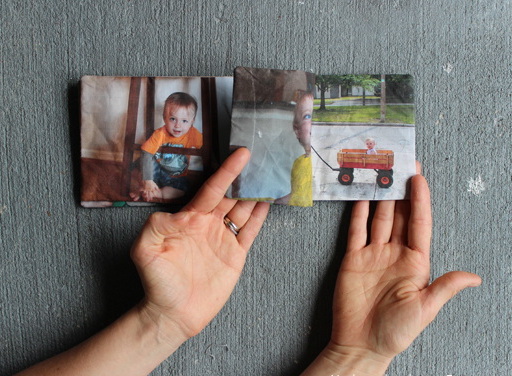
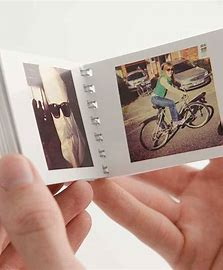
Creating a photo flip book is a delightful way to preserve memories and showcase your photography skills. A flip book, which consists of a series of images that create the illusion of motion when flipped, can be a personalized gift or a fun project for any occasion. This article will guide you through the process of making a photo flip book, covering everything from selecting materials to binding your finished product. By the end, you will have all the knowledge needed to create your own unique flip book.

Materials Needed
Before diving into the creation process, gather the following materials:
- Digital Photos: Choose images that tell a story or capture moments in sequence.
- Cardstock or Lightweight Paper: This will serve as the pages of your flip book.
- Adhesive: Mod Podge or glue sticks work well for attaching photos.
- Binding Supplies: Options include binder clips, staples, or clear packing tape.
- Cutting Tools: A paper cutter or scissors for trimming photos to size.
- Printer: A color printer to print your photos on cardstock.
- Ruler and Pencil: For measuring and marking cuts accurately.
- Decorative Elements: Stickers, washi tape, or markers for personalizing pages.
Step-by-Step Guide to Making a Photo Flip Book
Select Your Photos
Choose a series of photos that work together. These can be snapshots from an event, a trip, or any sequence that shows progression. Aim for around 10-20 images to keep it manageable. Consider themes such as:
- Family Events: Birthdays, holidays, or family reunions.
- Travel Adventures: Documenting trips with sequential shots of places visited.
- Daily Life: Capturing moments from everyday activities to tell a story.
Edit and Print Your Photos
Using photo editing software (like iPhoto, Photoshop, or any other), adjust your images if necessary. Enhance colors, crop unwanted elements, and apply filters if desired. Ensure they are high-resolution for quality printing. Print your selected photos on cardstock for durability.
Cut Your Photos
Once printed, carefully cut each photo to uniform size. A good dimension is about 3x5 inches, but you can customize this based on your preference. Make sure to keep them in consecutive order as you cut. If you're feeling creative, consider using decorative scissors for unique edges.
Prepare the Pages
Cut additional pages from lightweight paper or cardstock that are slightly larger than your photos. This will give your flip book a nice border and help with flipping. The extra space also allows room for notes or captions if you choose to add them later.
Arrange Your Photos
Take your cut photos and arrange them in order on the pages. Leave some space at the top or bottom for binding. This arrangement is crucial as it dictates how the story unfolds when flipping through the book.
Attach the Photos
Using glue or Mod Podge, adhere each photo to its corresponding page. Ensure that they are aligned properly and allow them to dry completely if using wet adhesive. For added stability, consider applying a thin layer of Mod Podge over the top of each photo once it's attached; this creates a protective coating.
Create a Cover (Optional)
For added flair, create a cover for your flip book using thicker cardstock or decorative paper. You can title it or add a personal message. Consider including an image that represents the theme of your flip book on the cover.
Bind Your Flip Book
There are several methods to bind your flip book:
- Stapling: Align all pages and staple them together at one end.
- Tape Binding: Use clear packing tape along one edge of the pages to hold them together.
- Binder Clips: For a temporary option, use binder clips to hold the pages together.
If you're looking for something more durable, consider using a hole punch and ribbon to tie the pages together.

Test Your Flip Book
Once bound, test your flip book by flipping through it quickly to see if the images flow smoothly. Check for any loose pages and ensure everything is securely attached.
Enjoy and Share!
Your photo flip book is now complete! Share it with friends and family or keep it as a cherished memory. You might also want to consider creating multiple copies as gifts for loved ones who were part of those special moments.
Tips for Enhancing Your Flip Book
Creating a basic flip book is just the beginning; here are some tips to enhance its appeal:
Use Consistent Themes
Stick with a theme for your photos to create a cohesive story. This could be based on events (like vacations), emotions (like joy), or even colors (like black and white). A strong theme helps convey your message more effectively.
Experiment with Layouts
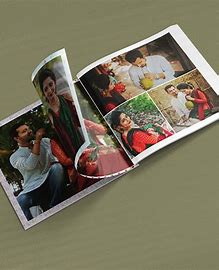
Try different arrangements of photos on each page for variety. You might want to mix full-page images with smaller ones or create collages that combine several pictures into one layout.
Add Text
Incorporate captions or dates alongside your images for context. This not only adds information but can also enhance storytelling by providing insights into what was happening at that moment.
Decorate the Pages
Use stickers, washi tape, or drawings to personalize each page further. This adds an artistic touch and makes each page feel unique.
Consider Animation Techniques
If you're feeling adventurous, explore simple animation techniques by slightly altering each successive image (e.g., moving an object slightly across frames) so that when flipped quickly, it creates an animated effect.
Digital Flip Book Alternatives
If you prefer digital formats, consider using software like MyFlipbook or Google Slides to create an animated version of your flip book that can be shared online or exported as a video file. Digital flip books can incorporate music and transitions that enhance the viewing experience.
Additionally, there are numerous online platforms where you can upload your images and create interactive flip books that mimic the physical experience but allow for digital sharing on social media platforms.
Conclusion
Creating a photo flip book is not only an enjoyable craft project but also a meaningful way to commemorate special moments in life. By following these steps and utilizing creative ideas, you can produce a beautiful keepsake that captures memories in motion. Whether you choose to make it physical or digital, each flip through your book will evoke nostalgia and joy.

Frequently Asked Questions
1. What type of photos work best for flip books?
Photos that depict movement or tell a story work best, such as sequences from events like birthdays, vacations, or sports activities.
2. Can I make a digital flip book?
Yes! You can use applications like MyFlipbook or Google Slides to create digital versions of flip books that can be shared online.
3. How do I ensure my printed photos are high quality?
Use high-resolution images when printing and select high-quality settings on your printer for the best results.
4. What is the best way to bind my flip book?
You can use staples, clear packing tape, or binder clips depending on how permanent you want the binding to be.
5. How many pages should my flip book have?
A good range is between 10-20 pages; this keeps it engaging without being overwhelming.
Citations:
[1] https://www.youtube.com/watch?v=-_My_EzQa7E
[2] https://www.brit.co/diy-flipbook/
[3] https://huggingface.co/datasets/svjack/DPO-ShareGPT-common-zh-reject-en/viewer
[4] https://my.fujifilm.com/uk/blog/how-to-create-a-fun-photo-flipbook
[5] https://www.cnblogs.com/apachecn/p/18443215
[6] https://www.youtube.com/watch?v=Un-BdBSOGKY
[7] https://yun.weicheng.men/Book/Python%E8%AE%A1%E7%AE%97%E6%9C%BA%E8%A7%86%E8%A7%89%E7%BC%96%E7%A8%8B.pdf
[8] https://www.reddit.com/r/Flipbooks/comments/z0ncnl/how_to_make_a_digital_flipbook/


