Content Menu
● Materials Needed
● Step-by-Step Instructions
>> Cut Your Paper
>> Create the Bag Body
>> Fold Down the Top Edge
>> Add Handles
>> Decorate Your Bag (Optional)
● Tips for Customization
● Environmental Considerations
● Conclusion
● Related Questions
>> 1. What types of paper can I use to make a paper bag?
>> 2. Can I make a larger paper bag using this method?
>> 3. What if I don't have glue?
>> 4. How can I make my paper bag more durable?
>> 5. Can I make a reusable paper bag?
● Citations:
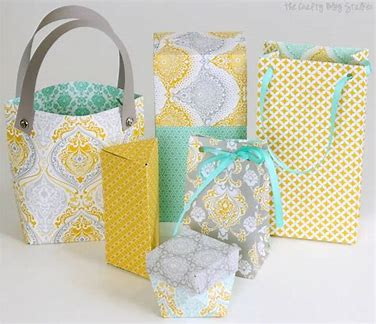
Creating a paper bag is a fun and practical craft that can be done with minimal materials. Whether you need a gift bag, a shopping bag, or simply want to engage in a creative project, making your own paper bag is an excellent choice. This article will guide you through the process step-by-step, ensuring you can create beautiful and functional paper bags for any occasion.

Materials Needed
Before starting, gather the following materials:
- Paper: You can use wrapping paper, craft paper, or even recycled paper. The size of the paper will depend on how large you want your bag to be.
- Glue: A strong adhesive such as glue stick or craft glue will work best.
- Scissors: For cutting the paper to the desired size.
- Ruler: To measure and ensure straight lines.
- Pencil: For marking measurements on the paper.
- Bone Folder or Creasing Tool (optional): This tool helps create crisp folds.
Step-by-Step Instructions
Cut Your Paper
Start by cutting your paper into a rectangle. A common size for a small gift bag is approximately 30 cm wide by 40 cm tall. If you're using wrapping paper, consider the design and choose a side that will face outward.
You can also experiment with different sizes depending on your needs. For instance, if you want to create a larger shopping bag, consider using dimensions like 40 cm by 50 cm. The thickness of the paper is also important; heavier papers are better for sturdiness while lighter papers can be used for decorative purposes.
Create the Bag Body
1. Fold the Paper: Take the rectangle and fold it in half lengthwise with the patterned side facing inward. This will form the base of your bag.
2. Secure the Sides: Apply glue along one edge of the folded paper and press it down to secure it. This creates a tube shape.
3. Flatten the Bottom: To form the bottom of the bag, open up the tube slightly and fold down about 5 cm from each end of the bottom edge. This creates two triangular flaps.
4. Create Base Corners: Fold these triangular flaps inward towards the center of the bag's bottom to form a flat base. Secure them with glue.
This step is crucial as it determines how well your bag will stand when filled with items. Ensure that your folds are sharp and well-defined for maximum stability.
Fold Down the Top Edge
To finish off the top of your bag, fold down about 5 cm from the top edge. This adds strength to your bag and gives it a neat appearance.
You can also create additional folds at this stage if you want to add more decorative elements or if you wish to create a scalloped edge for an artistic touch.
Add Handles
1. Cut Handle Strips: Using leftover paper or ribbon, cut two strips for handles. Each strip should be about 2-3 cm wide and long enough to create a comfortable handle length.
2. Attach Handles: Glue each end of the handle strips inside the top fold of your bag, ensuring they are evenly spaced for balance.
If you want to make your handles more robust, consider doubling up on your handle strips or using thicker materials like fabric or sturdy ribbon.
Decorate Your Bag (Optional)
If you want to personalize your bag further, consider decorating it with stickers, stamps, or drawings. You can also use washi tape or other embellishments to enhance its appearance.
Adding decorations not only makes your bag unique but also allows you to express creativity. You could even use themed decorations for special occasions like birthdays or holidays.

Tips for Customization
There are numerous ways to customize your paper bags:
- Color Coordination: Match colors based on seasons or events—pastels for spring, bright colors for summer parties, and warm tones for autumn gatherings.
- Stencils and Stamps: Use stencils or stamps to create patterns on your bags. This adds texture and visual interest without requiring advanced artistic skills.
- Personal Messages: Write personal notes or messages on tags attached to handles for gifts; this adds a thoughtful touch that recipients appreciate.
- Layering Techniques: Experiment with layering different types of papers (e.g., patterned over solid) for added depth in design.
Environmental Considerations
Using paper bags instead of plastic bags is an environmentally friendly choice that helps reduce waste in landfills and oceans. Paper is biodegradable and recyclable, making it a sustainable option when crafted correctly.
To further enhance their eco-friendliness:
- Consider using recycled paper as your primary material.
- Avoid excessive decoration that may hinder recyclability—stickers made from plastic should be avoided if possible.
- Encourage others to reuse these bags multiple times before recycling them.
Conclusion
Making a paper bag is not only an enjoyable activity but also an environmentally friendly alternative to plastic bags. By following these simple steps, you can create beautiful bags for gifts or shopping that reflect your personal style and creativity.
The process encourages creativity while promoting sustainability—a perfect combination in today's world where environmental awareness is crucial.

Related Questions
1. What types of paper can I use to make a paper bag?
You can use various types of paper including wrapping paper, craft paper, recycled newspapers, or old gift bags. The key is to choose something sturdy enough to hold items without tearing.
2. Can I make a larger paper bag using this method?
Yes! Simply increase the dimensions of your starting rectangle while maintaining proportionality in folds and cuts for larger bags.
3. What if I don't have glue?
If glue is unavailable, you can use double-sided tape or even staples as alternatives for securing edges together.
4. How can I make my paper bag more durable?
To enhance durability, consider using thicker paper or reinforcing areas where stress is likely, such as handles and corners.
5. Can I make a reusable paper bag?
Yes! By using thicker materials and reinforcing seams properly, you can create a reusable paper bag that withstands multiple uses.
Citations:
[1] http://www.hellosandwich.jp/handmade-paper-bag-tutorial
[2] https://www.youtube.com/watch?v=ESuxIr_i1XI
[3] https://www.youtube.com/watch?v=xRDoSMRP54E
[4] https://www.youtube.com/watch?v=WwgAFahGyQQ
[5] https://www.youtube.com/watch?v=CWu3wHXS2LU
[6] https://www.youtube.com/watch?v=suHnDpYTmIk
[7] https://www.youtube.com/watch?v=GXmtMAP1m_0


