Content Menu
● Materials Needed
● Basic Paper Bag Design
>> Step 1: Cut the Paper
>> Step 2: Fold the Paper
>> Step 3: Secure the Bottom
>> Step 4: Forming the Sides
>> Step 5: Finishing Touches
● Creative Variations
>> Decorative Paper Bags
>> Stamped Designs
>> Collage Style
● Eco-Friendly Options
>> Recycled Newspaper Bags
>> Brown Kraft Paper Bags
● Tips for Success
● Conclusion
● Related Questions
>> 1. What type of paper is best for making sturdy bags?
>> 2. Can I use printed wrapping paper to make bags?
>> 3. How do I make larger bags?
>> 4. Are there any templates available online?
>> 5. How can I decorate my handmade bags?
Creating paper bags is a rewarding and environmentally friendly craft that anyone can do at home. Whether you need bags for gifts, shopping, or storage, making your own paper bags allows you to customize them to fit your needs. In this article, we will explore various methods for making paper bags, the materials required, and some creative ideas to enhance your bag-making experience.

Materials Needed
Before diving into the steps of making paper bags, it is essential to gather the necessary materials. Here's a list of items you will need:
- Paper: You can use various types of paper such as kraft paper, recycled paper, or decorative scrapbook paper. The thickness of the paper will affect the durability of the bag.
- Scissors: A good pair of scissors is crucial for cutting the paper to size.
- Glue or Tape: Depending on your preference, you can use glue sticks, double-sided tape, or craft tape to secure the bag's seams.
- Ruler: A ruler will help you measure and mark straight lines for cutting and folding.
- Pencil: Use a pencil for marking measurements on the paper.
- Optional Decorations: If you want to personalize your bags, consider using stamps, stickers, ribbons, or markers.
Basic Paper Bag Design
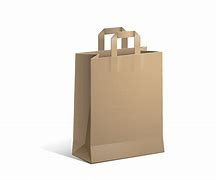
The simplest design for a paper bag is a rectangular bag with a flat bottom. Here's how to make one:
Step 1: Cut the Paper
Start by cutting a piece of paper to your desired size. A common size for a small bag is 12 inches by 24 inches. You can adjust the dimensions based on how large or small you want your bag to be.
Step 2: Fold the Paper
Once you have your piece of paper cut out, lay it flat on a surface.
- Fold the Paper in Half: Bring the two shorter edges together and crease the fold well. This will be the center of your bag.
- Create the Bottom: Open up the folded paper and fold about 3 inches from the bottom edge towards the center crease. This will create a flap that forms the bottom of your bag.
Step 3: Secure the Bottom
Now that you have created a flap for the bottom:
- Fold Up the Sides: Fold each side of the flap towards the center crease. This should create two triangular shapes at each end of the flap.
- Glue or Tape: Secure these triangular flaps down using glue or tape. Make sure they are firmly attached as this will provide support for your bag.
Step 4: Forming the Sides
Next, you'll want to form the sides of your bag:
- Fold Up Each Side: With your bag still flat, fold up each side towards the center crease until they meet at the top edge. This creates a box-like shape.
- Secure with Glue or Tape: Apply glue or tape along these edges to hold everything in place.
Step 5: Finishing Touches
To finish your bag:
- Fold Down the Top Edge: Create a clean edge by folding down about an inch from the top of your bag.
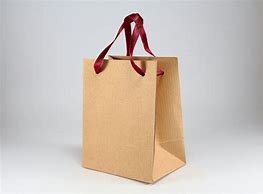
- Add Handles (Optional): If you want handles for easy carrying, cut two strips of paper (about 1 inch wide) and attach them to either side of your bag using glue or tape.

Creative Variations
While the basic design is functional, there are many ways to get creative with your paper bags:
Decorative Paper Bags
You can personalize your bags by using decorative papers or adding designs. Consider using patterned scrapbook paper or wrapping paper for festive occasions like birthdays or holidays.
Stamped Designs
Using rubber stamps and ink pads can add unique designs to your bags. Simply stamp patterns onto plain paper before cutting and assembling your bag.
Collage Style
For a more artistic approach, consider creating a collage on your bag using different pieces of colored paper or magazine cutouts. This method allows for endless creativity and personalization.
Eco-Friendly Options
Making paper bags from recycled materials is an excellent way to promote sustainability. Here are some eco-friendly ideas:
Recycled Newspaper Bags
Old newspapers can be transformed into stylish bags. Follow similar steps as above but use newspaper instead of standard craft paper. The printed designs add character and uniqueness to each bag.
Brown Kraft Paper Bags
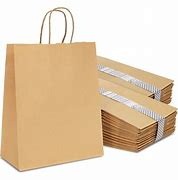
Using brown kraft paper is another eco-friendly option. It is durable and gives a rustic look to your bags. You can decorate it with stamps or natural twine for an added touch.
Tips for Success
To ensure that your paper bag-making experience goes smoothly, consider these tips:
- Practice Makes Perfect: If you're new to making bags, practice with scrap pieces of paper first until you feel comfortable with the process.
- Use Quality Materials: Investing in good quality paper will make a significant difference in how sturdy and attractive your bags turn out.
- Be Creative: Don't be afraid to experiment with different sizes and styles. The more you try, the more unique designs you will create!
Conclusion
Making paper bags is not only a fun and creative activity but also an environmentally friendly alternative to plastic bags. With just a few materials and some simple steps, anyone can create beautiful and functional bags for various purposes. Whether you're preparing for a special occasion or looking for ways to reduce waste in everyday life, crafting your own paper bags offers both practicality and personal expression.

Related Questions
1. What type of paper is best for making sturdy bags?
Using kraft paper is ideal due to its thickness and durability; however, recycled cardstock can also work well for sturdier options.
2. Can I use printed wrapping paper to make bags?
Yes! Printed wrapping paper can add color and style to your bags; just ensure it's thick enough to hold items securely.
3. How do I make larger bags?
To make larger bags, simply increase the dimensions of your initial piece of paper while maintaining proper proportions for folds and flaps.
4. Are there any templates available online?
Yes! Many websites offer free templates that you can print out and use as guides when making various styles of paper bags.
5. How can I decorate my handmade bags?
You can decorate them using stamps, stickers, washi tape, colored markers, or even by adding fabric embellishments like ribbons or bows.


