Content Menu
● Materials Needed
● Step-by-Step Guide to Drawing a Gift Box
>> Step 1: Draw the Outline of the Box
>> Step 2: Add the Box Lid
>> Step 3: Draw the Ribbon
>> Step 4: Create the Bow
>> Step 5: Add Details and Shading
>> Step 6: Erase Unnecessary Lines
>> Step 7: Color Your Drawing
● Advanced Techniques for Gift Box Art
>> Perspective Drawing
>> Adding Background Elements
>> Experimenting with Patterns
● Tips for Enhancing Your Gift Box Drawing Skills
● Conclusion
● Related Questions
>> 1. What are some common mistakes when drawing a gift box?
>> 2. How can I improve my drawing skills?
>> 3. What types of coloring materials are best for beginners?
>> 4. Can I draw a gift box digitally?
>> 5. What are some creative ideas for decorating my gift box drawings?
Drawing a gift box is a delightful and creative endeavor that can bring joy to both the artist and the recipient. Whether you're preparing for a special occasion or simply want to enhance your drawing skills, learning how to draw a gift box can be both fun and rewarding. This guide will take you through the process step-by-step, ensuring that you can create a beautiful gift box that captures the essence of giving.

Materials Needed
Before you start, gather the following materials:
- Paper: Choose any type you prefer, but thicker paper is recommended for durability.
- Pencil: A sharp pencil will help you create fine lines.
- Eraser: Essential for correcting any mistakes.
- Coloring Supplies: Colored pencils, markers, or any other medium you like to add color to your drawing.
- Ruler: Useful for creating straight lines and ensuring symmetry in your design.
- Fine-tip Pen: For outlining your drawing after completing it with pencil.
Step-by-Step Guide to Drawing a Gift Box
Step 1: Draw the Outline of the Box
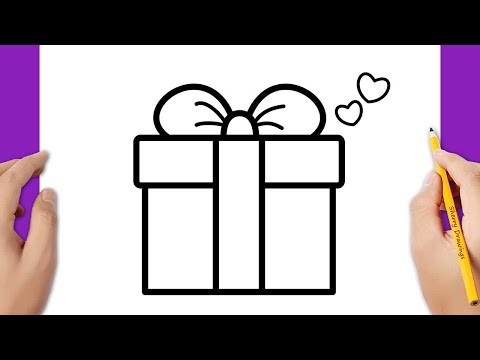
Begin by sketching a simple rectangle. This rectangle will serve as the base of your gift box. Make sure the lines are straight and even.
- Start with a horizontal line for the bottom of the box.
- Draw two vertical lines rising from each end of the bottom line.
- Connect these vertical lines with another horizontal line at the top to complete the rectangle.
This initial shape forms the foundation of your gift box. Ensure that the rectangle is proportionate; a well-proportioned box appears more realistic.
Step 2: Add the Box Lid
Next, draw the lid of the gift box. This will add depth and dimension to your drawing.
- Using straight lines, draw another rectangle slightly smaller than the first one on top of it. Ensure that it is centered over the base rectangle.
- The top rectangle should have its sides parallel to those of the bottom rectangle.
The lid can be drawn with a slight overlap on one side, giving it a more dynamic look as if it's slightly ajar or ready to be opened.
Step 3: Draw the Ribbon
Now it's time to add some festive flair with a ribbon.
- Begin by drawing two vertical lines down from the top edges of the lid, extending them slightly beyond the base of your box.
- Connect these vertical lines with horizontal lines at both the top and bottom, creating a cross shape over your box.
To make this step easier, visualize how ribbons typically wrap around boxes. They often have a natural flow and curvature that can be replicated in your drawing.
Step 4: Create the Bow
The bow is an essential part of any gift box, adding charm and character.
- At the center of where your ribbon crosses, draw two loops on either side. These should be curved shapes that mimic how a bow looks when tied.
- Add details by drawing smaller loops inside each larger loop to give it more volume.
Consider making one side of the bow slightly larger than the other for an asymmetrical look, which often adds interest and realism.
Step 5: Add Details and Shading
To make your gift box look more realistic, incorporate details and shading.
- Draw some pleats in the ribbon to show folds and texture.
- Use light pencil strokes to add shading along one side of the box and under the lid. This will create a three-dimensional effect.
- You can also add patterns or designs on the box itself if desired. Consider using polka dots, stripes, or even holiday-themed designs like snowflakes or stars.
Shading is crucial; it helps define shapes and gives your drawing depth. Use softer pencil strokes for lighter areas and firmer strokes for shadows.
Step 6: Erase Unnecessary Lines
Once you're satisfied with your drawing, use an eraser to remove any guidelines or extra lines that are no longer needed. This will clean up your artwork and make it look polished.
Take care not to erase too much; some guidelines can help maintain proportions as you finalize your design.
Step 7: Color Your Drawing
Finally, bring your gift box to life with color!
- Choose vibrant colors for both the box and ribbon. Traditional colors include red, green, blue, or gold.
- Consider using different shades for highlights and shadows to enhance depth. For example, use lighter shades where light would hit and darker shades in shadowed areas.
When coloring, think about where light sources would naturally fall on your gift box. This will help guide your choices in shading and highlight placement.
Advanced Techniques for Gift Box Art
Once you've mastered basic techniques, consider exploring more advanced methods:
Perspective Drawing
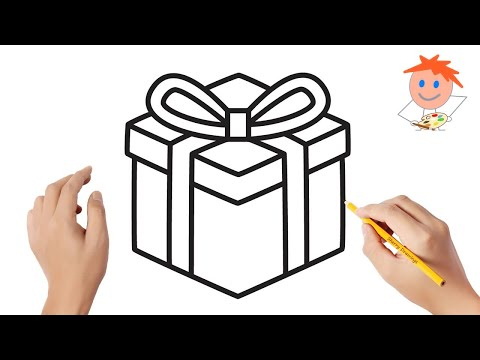
Try drawing your gift box from different angles. This can involve using vanishing points to create depth or depicting how ribbons wrap around corners.
To practice perspective:
1. Choose a point on your paper where you want to establish your vanishing point.
2. Draw guidelines from this point outward to create an illusion of depth.
3. Sketch your gift box along these guidelines, adjusting dimensions accordingly.
This technique can make your drawings appear more dynamic and engaging.

Adding Background Elements
Enhance your composition by adding background elements like festive decorations or other gifts. This can create context and make your drawing more engaging.
Consider including:
- A decorated tree if it's around Christmas time.
- A table setting with other gifts stacked beside yours.
- Seasonal elements like autumn leaves or spring flowers depending on the occasion.
These additions not only fill negative space but also tell a story about why this gift is special.
Experimenting with Patterns
Incorporate patterns on your gift box such as stripes, polka dots, or holiday-themed designs. This adds personality and flair to your artwork.
You might try:
- Creating a plaid pattern using alternating colors for added complexity.
- Adding glitter effects with colored pencils or metallic markers for visual interest.
Patterns can evoke emotions associated with specific occasions—like joy during birthdays or warmth during holidays—making them an excellent way to personalize your artwork further.
Tips for Enhancing Your Gift Box Drawing Skills
As you continue practicing how to draw gift boxes, consider these tips:
1. Study Real Boxes: Observe actual gift boxes when wrapping presents. Notice their shapes, colors, textures, and how light interacts with them.
2. Use References: Look at images online or in magazines for inspiration. These references can provide ideas for unique designs or styles you may want to try out in your own drawings.
3. Practice Regularly: Like any skill, regular practice helps improve technique over time. Set aside time each week dedicated solely to drawing different types of boxes or gifts.
4. Join Art Communities: Engage with fellow artists online or in local groups. Sharing work can provide constructive feedback while inspiring new ideas through collaboration.
5. Keep Experimenting: Don't hesitate to try new styles—whether realistic or cartoonish—and explore various mediums like watercolors or digital art software as you grow as an artist.
Conclusion
Drawing a gift box is not just about creating an image; it's about capturing the joy of giving and celebration. Whether you're preparing for holidays or special occasions, this skill allows you to express creativity while bringing smiles to others' faces. Remember that practice makes perfect; don't hesitate to try different styles and techniques as you grow in your artistic journey.
The ability to draw beautifully wrapped gifts can enhance personal projects such as greeting cards or invitations while also serving as a fun activity during family gatherings or art classes. Embrace this artistic challenge; every stroke brings you closer to mastering this delightful subject!

Related Questions
1. What are some common mistakes when drawing a gift box?
Common mistakes include uneven lines, incorrect proportions between the lid and base, neglecting shading which can make drawings look flat instead of three-dimensional, and failing to capture realistic ribbon flow.
2. How can I improve my drawing skills?
Practice regularly by sketching various objects, experimenting with different styles, studying tutorials or art books that focus on drawing techniques, seeking feedback from peers or mentors, and participating in workshops or online courses focused on art fundamentals.
3. What types of coloring materials are best for beginners?
Colored pencils are often recommended for beginners due to their ease of use and control over blending colors smoothly together without overwhelming mistakes. Markers can also be fun but may require more practice due to their permanence once applied.
4. Can I draw a gift box digitally?
Absolutely! Digital drawing software offers various tools that can enhance your artwork including layers for easier editing allowing adjustments without ruining previous work; color adjustment options enable quick changes without starting over entirely; brushes mimic traditional mediums providing versatility in style choices too!
5. What are some creative ideas for decorating my gift box drawings?
Consider adding personal touches like names or messages on tags attached to ribbons; incorporating seasonal themes like snowflakes for winter celebrations; using floral designs during springtime events; experimenting with metallic colors giving an elegant touch; creating whimsical patterns reflecting personality traits associated with recipients' interests!


