Content Menu
● Understanding the Basics of Gift Box Making
>> Materials You Will Need
● Step-by-Step Guide to Making a Basic Gift Box
>> Step 1: Choose Your Box Size
>> Step 2: Prepare Your Materials
>> Step 3: Create a Template
>> Step 4: Cut Out the Template
>> Step 5: Score the Fold Lines
>> Step 6: Fold and Assemble
>> Step 7: Create the Lid
● Decorating Your Gift Box
● Creative Variations of Gift Boxes
>> 1. Pillow Boxes
>> 2. Hexagonal Boxes
>> 3. Origami Boxes
>> 4. Nested Boxes
● Eco-Friendly Gift Box Ideas
● Conclusion
● Frequently Asked Questions
>> 1. What type of paper is best for making gift boxes?
>> 2. Can I use old materials to make gift boxes?
>> 3. How do I ensure my box stays closed?
>> 4. What decorations can I use on my gift box?
>> 5. Are there any templates available online?
Creating gift boxes is a delightful way to add a personal touch to your gifts. Whether you are preparing for a birthday, holiday, or special occasion, making your own gift boxes allows you to customize the size, shape, and design according to the recipient's preferences. This guide will walk you through the various methods and materials you can use to create beautiful gift boxes that will impress anyone who receives them.

Understanding the Basics of Gift Box Making
Before diving into the specifics of making gift boxes, it's essential to understand the basic components involved. A gift box typically consists of:
- Box Structure: The main body that holds the gift.
- Lid: The cover that closes the box.
- Decorative Elements: Items such as ribbons, stickers, or embellishments that enhance the box's appearance.
Materials You Will Need
To make your own gift boxes, gather the following materials:
- Cardstock or cardboard
- Scissors
- Ruler
- Pencil
- Craft knife (optional)
- Glue or double-sided tape
- Decorative paper or wrapping paper
- Ribbons and bows for decoration
Step-by-Step Guide to Making a Basic Gift Box
Step 1: Choose Your Box Size
Decide on the size of your gift box based on the item you plan to place inside. A simple way to determine dimensions is to measure the object's length, width, and height.
Step 2: Prepare Your Materials
Once you have your measurements, select a sturdy cardstock or cardboard for your box. Cardstock is ideal for smaller boxes, while cardboard works well for larger gifts.
Step 3: Create a Template
Using a ruler and pencil, draw out a template on your cardstock. For a basic square box, follow these dimensions:
1. Draw a square that is twice as wide as it is tall.
2. Create flaps on each side by extending the sides of the square outward.
3. The flaps should be about one-third of the height of the box.
Step 4: Cut Out the Template
Carefully cut out your template using scissors or a craft knife. Make sure to cut along straight lines for clean edges.
Step 5: Score the Fold Lines
To ensure that your box folds neatly, score along the lines where you will fold. Use a ruler and a blunt edge (like a butter knife) to create shallow grooves without cutting through the paper.
Step 6: Fold and Assemble
Begin folding along the scored lines. Start with the sides and then fold in the flaps. Use glue or double-sided tape to secure the flaps in place.
Step 7: Create the Lid
To make a matching lid, repeat steps 3 through 6 but adjust your dimensions slightly larger than those of your box base. This will ensure that the lid fits over the box snugly.

Decorating Your Gift Box
Once your box is assembled, it's time to decorate! Here are some ideas:
- Wrap It: Use decorative wrapping paper to cover your box completely.
- Add Ribbons: Tie a ribbon around the box for an elegant touch. You can also create bows for added flair.
- Personalize It: Use stickers or stamps to add names or messages directly onto the box.
- Use Embellishments: Consider adding flowers, sequins, or other embellishments that match the occasion.
Creative Variations of Gift Boxes
While basic gift boxes are great for many occasions, consider these creative variations:
1. Pillow Boxes
Pillow boxes are curved on two sides and resemble a pillow shape. They are easy to make and perfect for small gifts like jewelry or candies. To create one:
- Cut out an elongated oval shape from cardstock.
- Score along both long edges and fold inward.
- Secure with glue or tape.
2. Hexagonal Boxes
For something unique, try making hexagonal boxes. These require more precise measurements but create stunning results.
3. Origami Boxes
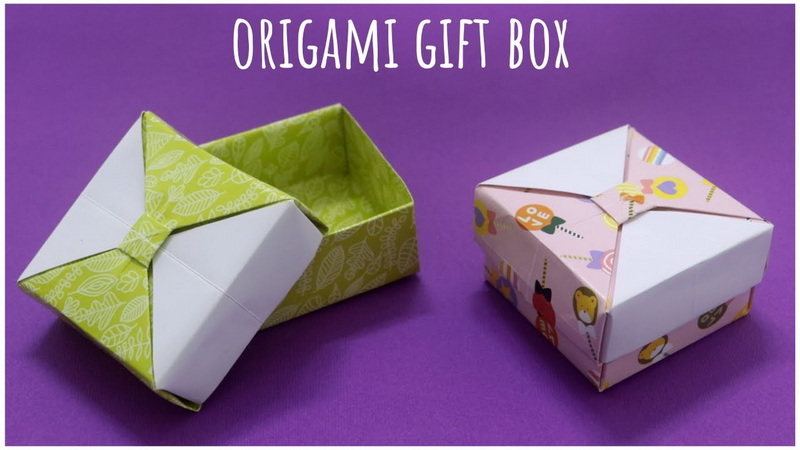
Origami boxes are made from a single sheet of paper folded into shape without any cuts or glue. This method is excellent for those who enjoy intricate designs.
4. Nested Boxes
Create a set of nested boxes by making several smaller boxes that fit inside one another. This approach works well for gifts that require multiple layers or surprises.
Eco-Friendly Gift Box Ideas
If you're looking for sustainable options, consider these eco-friendly alternatives:
- Recycled Materials: Use old newspapers or magazines to create unique patterns.
- Fabric Boxes: Sew small fabric boxes that can be reused after opening.
- Natural Elements: Incorporate elements like twine and dried flowers for decoration instead of synthetic materials.
Conclusion
Making gift boxes is not only an enjoyable craft but also allows you to add a personal touch to your gifts. By following these steps and exploring various designs and materials, you can create beautiful packaging that enhances any present's appeal. Whether you're preparing for holidays, birthdays, or just because, homemade gift boxes are sure to delight both you and your recipients.

Frequently Asked Questions
1. What type of paper is best for making gift boxes?
Cardstock is generally recommended because it is sturdy yet easy to work with. For larger boxes, cardboard provides additional strength.
2. Can I use old materials to make gift boxes?
Absolutely! Reusing old materials like cardboard from shipping boxes or wrapping paper can create unique designs while being environmentally friendly.
3. How do I ensure my box stays closed?
Using strong adhesive like glue or double-sided tape on all flaps will help keep your box securely closed.
4. What decorations can I use on my gift box?
You can use ribbons, bows, stickers, stamps, or even natural elements like flowers and twine for decoration.
5. Are there any templates available online?
Yes! Many websites offer free printable templates for various styles of gift boxes which can simplify your crafting process.


