Content Menu
● Materials Needed
● Step-by-Step Instructions
>> Choose Your Paper Type
>> Measure and Cut the Paper
>> Fold the Sides
>> Create the Bottom of the Bag
>> Secure the Bottom
>> Finalize Your Bag
>> Add Finishing Touches
● Tips for Making Paper Gift Bags
● Creative Ideas for Customization
● Conclusion
● Frequently Asked Questions
>> 1. What type of paper is best for making gift bags?
>> 2. Can I make handles for my gift bags?
>> 3. How do I decorate my DIY gift bags?
>> 4. Is there a way to make my gift bags more durable?
>> 5. Can I use recycled materials?
Creating your own paper gift bags is not only a fun and creative activity but also a sustainable and cost-effective way to present gifts. Whether you are preparing for a birthday, holiday, or any special occasion, making your own gift bags allows you to personalize the wrapping while also adding a unique touch to your presents. This guide will provide you with detailed instructions on how to make various types of paper bags for gifts, along with tips on materials, decoration, and more.

Materials Needed
Before you start crafting your paper gift bags, gather the following materials:
- Paper: You can use wrapping paper, craft paper, old maps, or even recycled newspapers.
- Scissors: For cutting the paper to the desired size.
- Tape or Glue: To secure the folds and seams.
- Hole Punch: Optional, for creating holes for ribbon or handles.
- Ribbon or String: For decorating and closing the bag.
- Gift Tags: Optional, for personalizing your gift.
Step-by-Step Instructions
Choose Your Paper Type
Selecting the right type of paper is crucial. Consider using:
- Wrapping Paper: Great for festive occasions and comes in various designs.
- Kraft Paper: Eco-friendly and sturdy; perfect for a rustic look.
- Decorative Paper: Such as scrapbook paper or even pages from old books or maps.
Measure and Cut the Paper
To create a gift bag, you need to determine the size based on the item you want to wrap. Here's how:
- Measure the width and height of your gift.
- Cut a rectangle of paper that is approximately twice the height of your gift plus its width. For example, if your gift is 6 inches tall and 4 inches wide, cut a piece of paper that is roughly 16 inches by 8 inches.
Fold the Sides
Place your cut paper face down on a flat surface.
- Fold the right and left sides toward the center so they overlap slightly.
- Secure this seam with tape or glue.

Create the Bottom of the Bag
To form the base:
- Fold up about 2 inches from the bottom of the paper.
- Unfold this section to create a crease.
- Open up this fold and flatten each corner to form triangular shapes. This will create a stable bottom for your bag.
Secure the Bottom
Fold each side of the bottom triangle towards the center and tape them down securely. This will ensure that your bag can hold its shape when filled.
Finalize Your Bag
Now that you have created the basic structure:
- Flip your bag upright and press down on all sides to ensure it opens properly.
- Place your gift inside.
To close it:
- Fold down the top flap over your gift.
- Use a hole punch to create holes at the top if you want to add ribbon for closure.
Add Finishing Touches
To enhance your DIY gift bag:
- Thread ribbon through the holes you punched and tie it in a bow.
- Attach a gift tag for personalization.
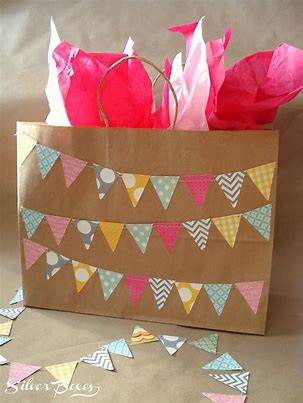
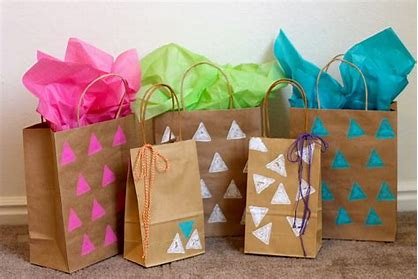
You can also decorate your bag further with stickers, stamps, or drawings to make it unique.
Tips for Making Paper Gift Bags
Creating paper bags can be made easier with these additional tips:
- Use Sturdy Paper: Medium-weight wrapping paper works best as it is durable yet easy to fold.
- Experiment with Sizes: Don't hesitate to adjust dimensions based on different gifts; larger gifts may require bigger bags while smaller gifts can be accommodated in petite bags.
- Reinforce if Necessary: If you're wrapping heavier items, consider adding a piece of cardboard at the bottom of your bag for added support.
Creative Ideas for Customization
Once you've mastered making basic paper bags, consider these creative ideas:
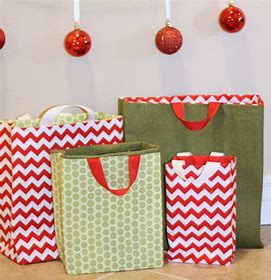
- Themed Bags: Match your bag design with the occasion (e.g., Christmas-themed wrapping paper for holiday gifts).
- Personalized Touches: Use photos or drawings relevant to the recipient on the bag.
- Layering Techniques: Combine different types of papers for a multi-textured look.
Conclusion
Making your own paper bags for gifts is an enjoyable craft that allows you to express creativity while being environmentally conscious. With just a few materials and simple steps, you can create beautiful bags that are not only functional but also aesthetically pleasing. Whether it's a birthday present or a holiday surprise, these DIY bags will surely impress anyone who receives them.

Frequently Asked Questions
1. What type of paper is best for making gift bags?
Using medium-weight wrapping paper or kraft paper is ideal as they are sturdy enough to hold gifts without being too difficult to fold.
2. Can I make handles for my gift bags?
Yes! You can punch holes on either side of the bag and thread through some ribbon or string to create handles.
3. How do I decorate my DIY gift bags?
You can use stickers, washi tape, stamps, or even drawings to personalize your bags further.
4. Is there a way to make my gift bags more durable?
Adding cardboard at the bottom of your bag can provide extra support for heavier items.
5. Can I use recycled materials?
Absolutely! Old newspapers, maps, or any decorative paper lying around can be repurposed into beautiful gift bags.


