Content Menu
● What Is a Hang Tag?
● Start With the Tag's Purpose
● Choose the Right Hang Tag Size and Shape
>> Common Shapes
● Design the Front for Instant Recognition
>> Create a Clear Visual Hierarchy
● Use the Back for Retail and Product Details
● Add a QR Code Strategically
● Select Paper, Finish, and Attachment
>> Attachment Options
● Prepare a Print-Ready Hang Tag File
● Avoid Common Hang Tag Design Mistakes
● A Simple Hang Tag Design Workflow
● Sustainability Without Greenwashing
● Hang Tag Design Checklist
● Conclusion
● FAQ
>> 1. What information should a hang tag include?
>> 2. What is the best size for a clothing hang tag?
>> 3. Should a hang tag be single-sided or double-sided?
>> 4. Where should the hole be placed on a hang tag?
>> 5. Can a QR code replace a barcode on a hang tag?
>> 6. What paper is best for premium hang tags?
● References
A well-designed hang tag does more than display a price. It is a small, physical brand ambassador that helps shoppers recognize your product, understand its value, and take action—whether that means scanning a QR code, visiting your website, or choosing your product over a competitor's.
For apparel, accessories, toys, stationery, cosmetics, and custom-printed products, the best hang tags balance brand identity, retail functionality, print quality, and compliance. This guide explains how to design a hang tag from strategy through print-ready artwork, with practical specifications used by brands and manufacturers.
What Is a Hang Tag?
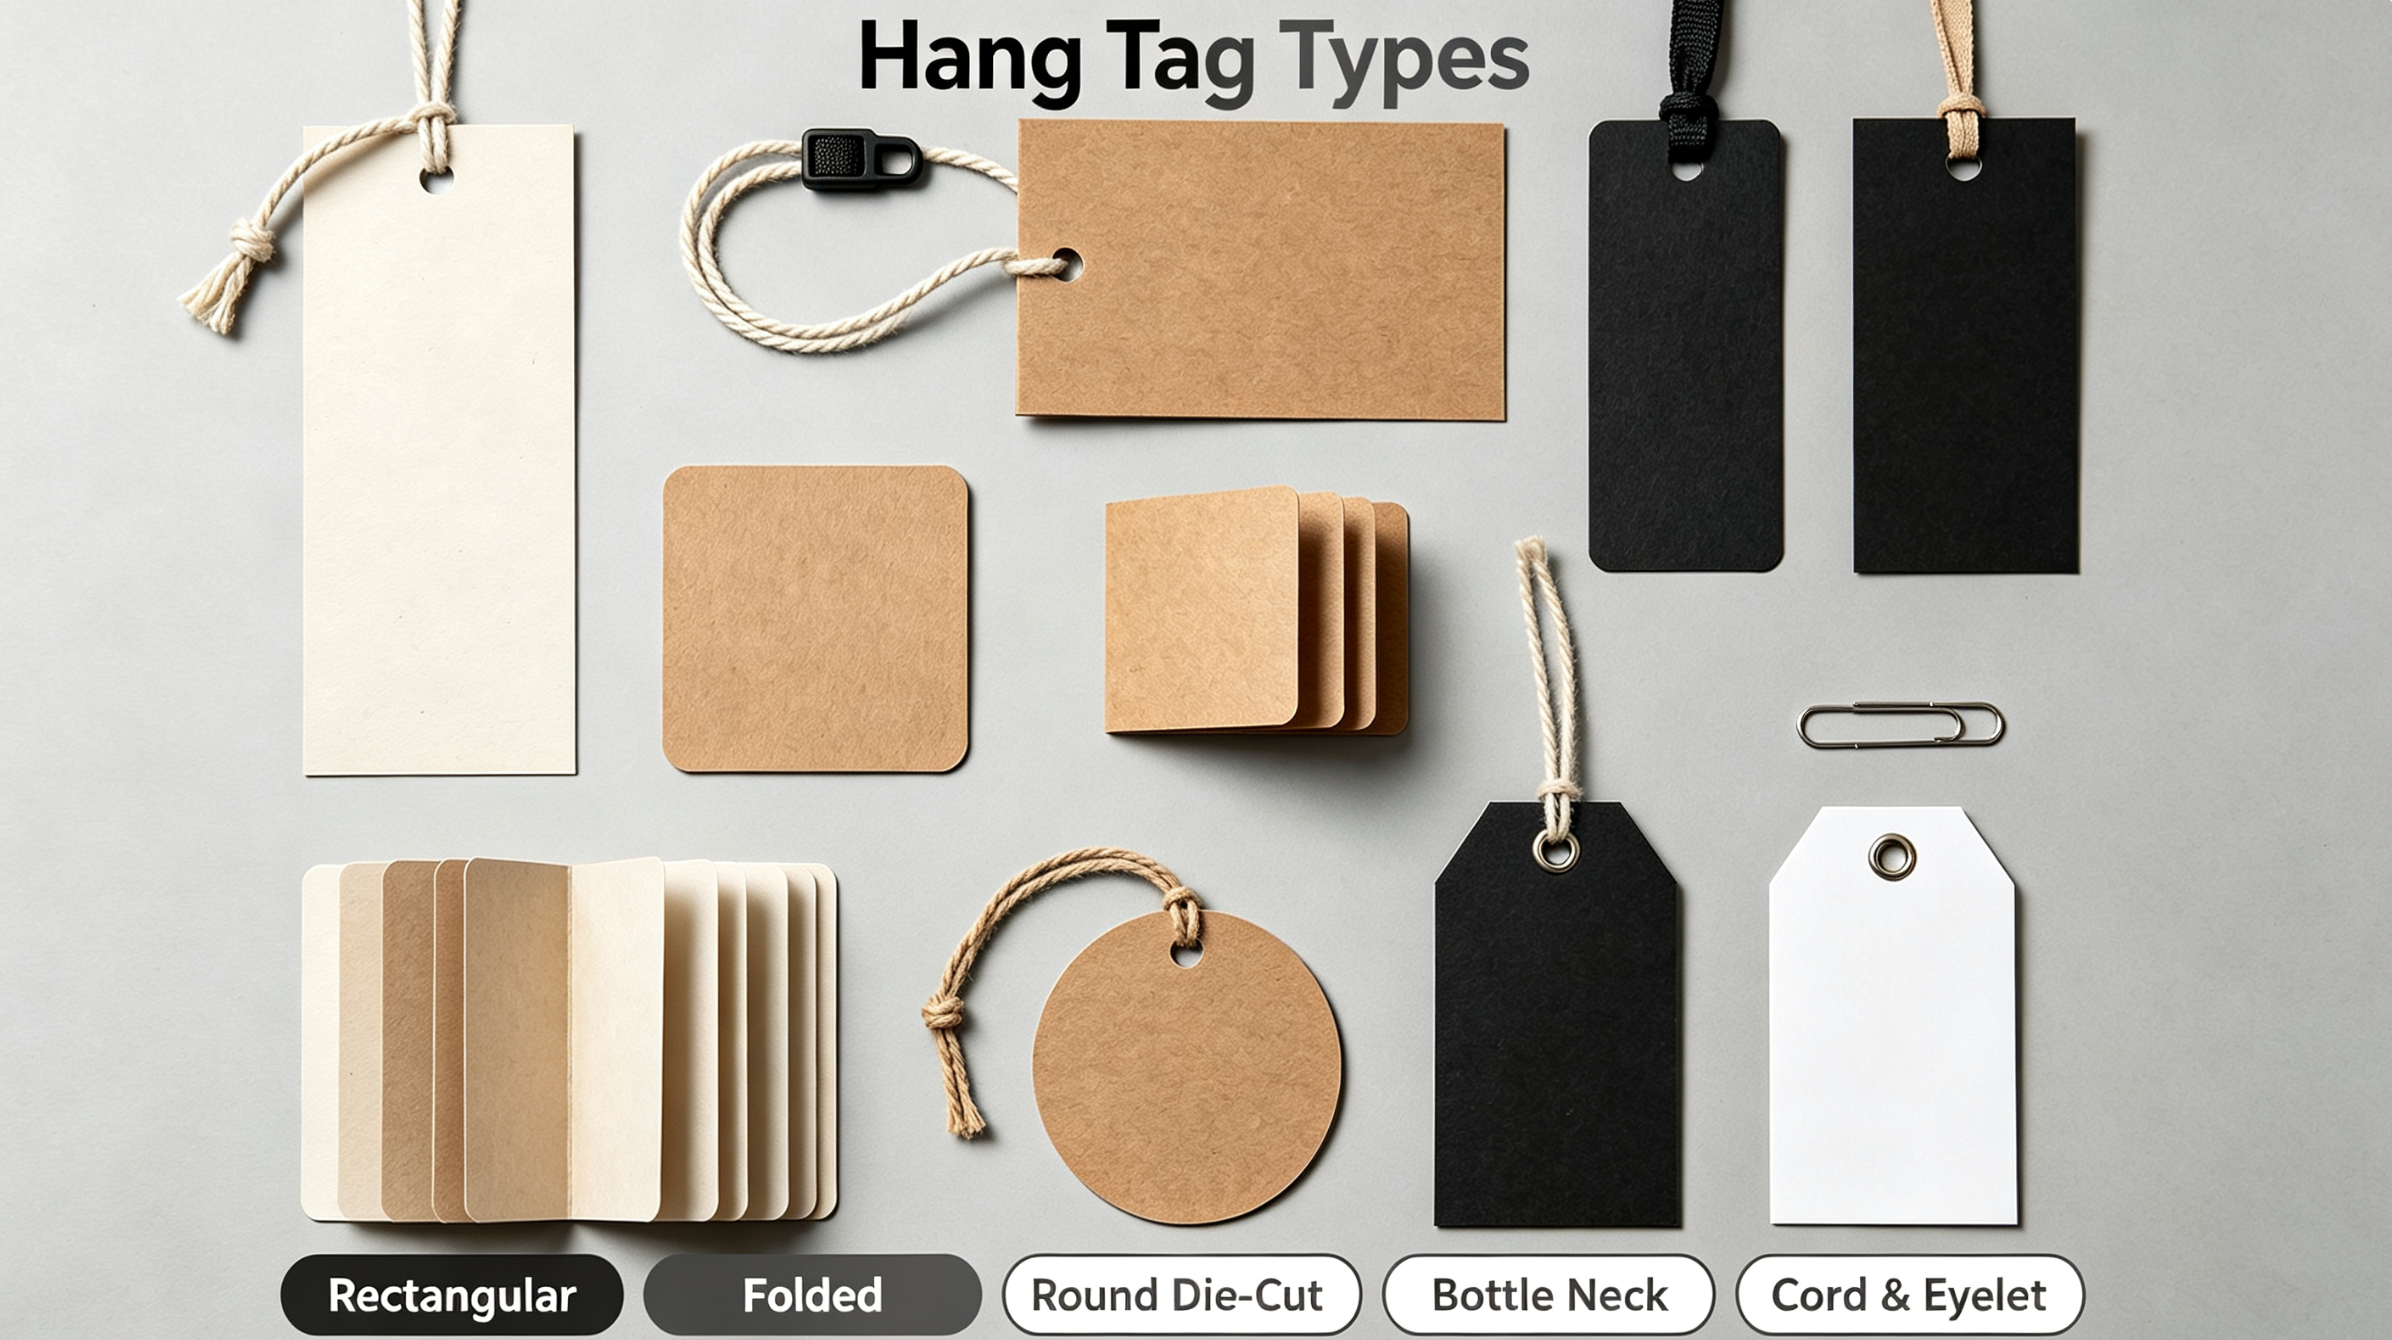
A hang tag is a printed card or label attached to a product with string, a plastic fastener, a safety pin, or another attachment method. Unlike a sewn-in care label, it is usually removable and is designed to communicate information at the point of sale.
Hang tags commonly appear on:
- Clothing, bags, hats, and footwear
- Jewelry, watches, and accessories
- Toys, puzzles, playing cards, and stationery
- Cosmetics, candles, and gift products
- Electronics accessories and promotional merchandise
A strong tag usually has two jobs: the front creates an immediate brand impression, while the back carries practical retail information such as price, size, barcode, materials, care guidance, or a QR code. Industry design guidance consistently recommends keeping the front simple and moving detailed product information to the reverse side. [psprint]
Start With the Tag's Purpose
Before choosing a size, paper, or finish, define what the hang tag must achieve. A tag designed for a luxury handbag will look very different from one attached to a children's puzzle or a promotional T-shirt.
Ask these questions first:
- Who is the target customer? A premium buyer may respond to embossing, foil, and textured paper; a mass-market buyer may need a clear price and barcode.
- Where will the product be sold? Retail shelves, boutiques, trade shows, e-commerce unboxing, and market stalls create different visibility requirements.
- What action should the customer take? Buy now, scan for authentication, follow social media, register a warranty, or learn about sustainability.
- What information is mandatory? Apparel and textile products may require fiber content, country of origin, and manufacturer or dealer identification, depending on the market. [ftc]
- How will the tag attach? The hole, string, pin, or plastic fastener must be planned before artwork is finalized.
Expert tip: Do not treat a hang tag as a miniature brochure. Its strongest role is to make one clear impression and guide the customer to the next step.
Choose the Right Hang Tag Size and Shape
Most apparel hang tags fall around 2 × 3.5 inches, although the ideal size depends on the product, retail display, and amount of required information. A larger tag provides more space for storytelling, but it can overwhelm a small product or increase shipping and material costs. [4over4]
| Product type |
Practical tag approach |
Recommended focus |
| Apparel |
2 × 3.5 in. vertical or horizontal tag |
Brand, size, price, barcode, QR code |
| Jewelry |
Small rectangle, square, or custom die-cut |
Logo, material, authenticity, care |
| Toys and puzzles |
Larger tag with safety and age information |
Product benefits, warnings, barcode |
| Gift products |
Premium shaped tag |
Brand story, gift message, QR code |
| Promotional merchandise |
Compact tag |
Campaign message, social handle, QR code |
Common Shapes
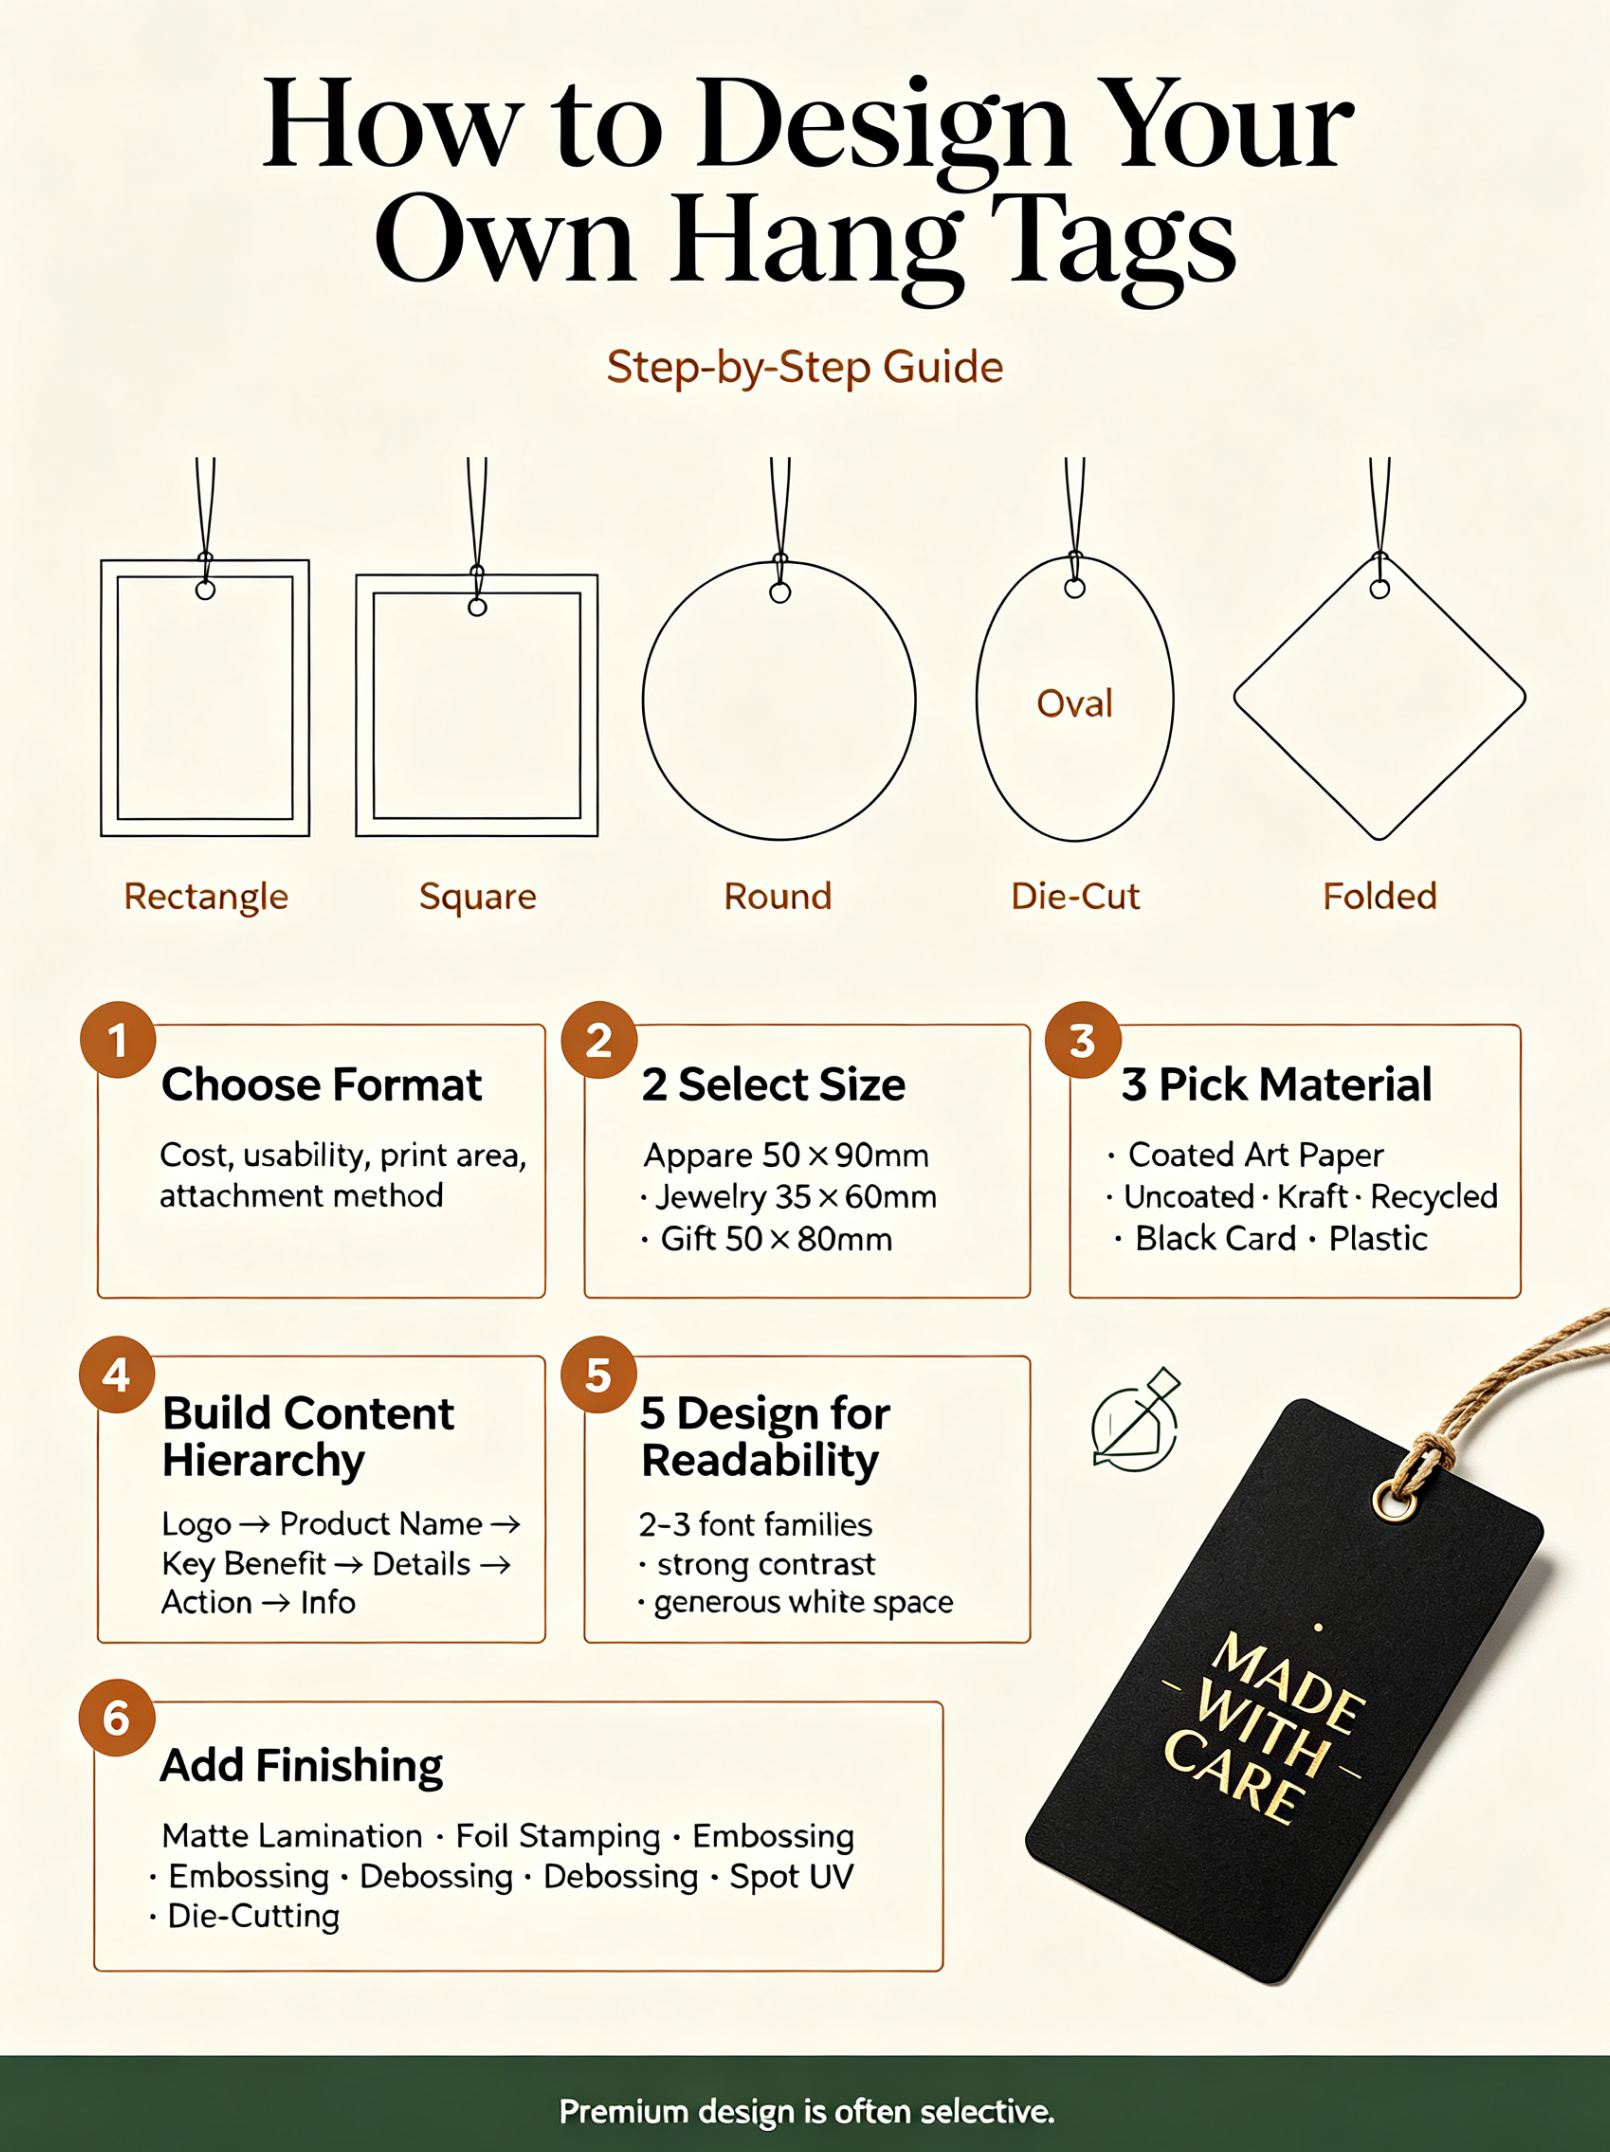
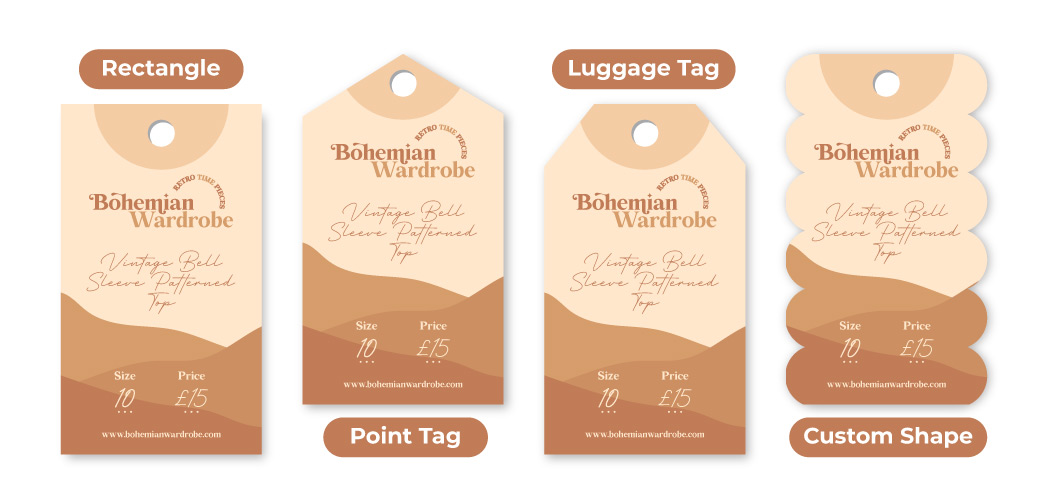
- Rectangle: The most cost-effective and versatile option.
- Rounded-corner rectangle: Softer, more premium appearance.
- Square: Works well for modern, minimalist brands.
- Custom die-cut: Strong shelf impact, but requires a die and usually a higher minimum order quantity.
- Folded tag: Useful when you need more space for product details, multilingual text, or a brand story.
When using a custom shape, make sure the die-cut does not interfere with the hole, barcode quiet zone, QR code, or important text.
Design the Front for Instant Recognition
The front of the hang tag should communicate the brand within seconds. Shoppers often scan a rail or shelf quickly, so clarity matters more than decoration.
Include only the most important front-side elements:
- Brand logo or wordmark
- Product name or collection name
- One concise benefit or tagline
- A key visual, pattern, or brand color
- Optional price, if price visibility supports the sales strategy
Avoid placing too much copy on the front. Print-industry guidance recommends using the tag to command attention, tell a brief story, and project the brand image rather than overload it with text. [psprint]
Create a Clear Visual Hierarchy
A effective hierarchy usually follows this order:
1. Logo or brand name
2. Product name or main benefit
3. Supporting image or color block
4. Short call to action or QR-code prompt
Use one dominant element, not five competing ones. If the logo is the priority, make it prominent. If sustainability is the main selling point, give that message more visual weight.
Use the Back for Retail and Product Details
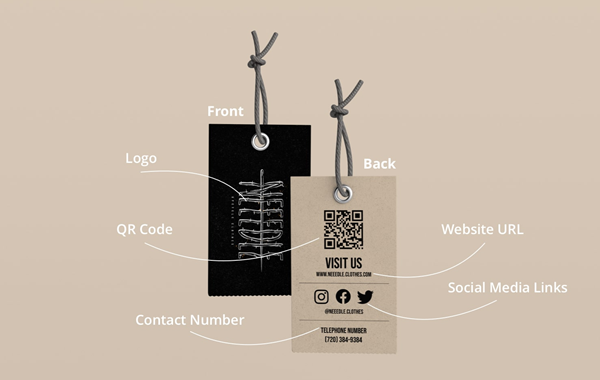
The back is where the hang tag becomes functional. It should be organized so a store associate or customer can find essential information quickly.
Common back-side elements include:
- Price and currency
- Size, color, SKU, or style number
- Barcode or QR code
- Material composition
- Care instructions, where appropriate
- Country of origin
- Brand website or social media handle
- Sustainability certifications or recycling guidance
- Contact information or customer-service QR code
For apparel sold in the United States, textile products generally require labeling information covering fiber content, country of origin, and the identity of the manufacturer or another responsible business. The FTC also notes that hang tags may disclose certain fiber names, trademarks, or performance claims, but additional disclosure rules can apply when the tag does not state the full fiber content. [ftc]
Important: A hang tag can support legally required information, but it should not be assumed to replace permanently attached garment labels. For many textile products, required labeling must remain attached until the product reaches the consumer. [sewport]
Add a QR Code Strategically
A QR code can turn a static hang tag into a digital touchpoint. It can link to a product page, sizing guide, authentication page, care instructions, warranty registration, social channel, or a limited-time offer.
Use QR codes for:
- Product authentication and serial-number verification
- Size charts and fit guidance
- Care and washing instructions
- Sustainability or material traceability
- User manuals for games, puzzles, and technical products
- Social media follow prompts
- Loyalty programs and promotions
Place the QR code on the back of the tag, away from the punched hole and attachment area. Keep enough white space around it so scanners can read it reliably, and test it after printing—especially if the code sits on a dark, textured, foil-stamped, or heavily coated background.
GS1 guidance for hang tags is generally similar to packaging guidance: retain the conventional EAN/UPC barcode in its usual location and place a 2D barcode on the other side of the tag or in a separate zone. GS1 also advises that barcodes should not be obscured by logos and should respect required quiet zones. [gs1]
Select Paper, Finish, and Attachment
Material selection affects both perceived quality and cost. A thick, uncoated stock may communicate an artisanal or sustainable position, while a coated stock with foil or spot UV can support a premium fashion brand.
| Material or finish |
Best use |
Consideration |
| Uncoated paper |
Eco-conscious, artisan, stationery, craft brands |
Natural texture; may absorb ink differently |
| Coated art paper |
Color-rich retail tags |
Smooth surface and strong color reproduction |
| Kraft paper |
Natural, recycled, or rustic branding |
Lower-cost look; check ink contrast |
| Foil stamping |
Luxury fashion, jewelry, premium gifts |
Higher cost; avoid fine reversed text |
| Embossing or debossing |
Premium logos and monograms |
Works best with simple artwork |
| Spot UV |
Modern, high-contrast designs |
Can scratch or show fingerprints |
| Soft-touch lamination |
Premium apparel and cosmetics |
Adds a tactile feel; may affect recyclability |
Attachment Options
- Cotton string: Natural, flexible, and suitable for apparel and craft products.
- Elastic loop: Convenient for tags that need to be removed and replaced.
- Plastic fastener: Secure and scalable for high-volume apparel.
- Safety pin: Common for garments, but ensure it does not damage delicate fabrics.
- Adhesive strip: Useful for flat products, though less appropriate for premium retail presentation.
Plan the hole before final artwork. Keep logos, QR codes, barcodes, and important copy clear of the punch area, and leave enough margin so the attachment does not tear the tag during handling.
Prepare a Print-Ready Hang Tag File
A beautiful design can fail in production if the artwork is not prepared correctly. Use a print-ready template whenever possible, because it defines the bleed, trim line, safety margin, and hole position.
Follow these production rules:
1. Design at final trim size. Do not scale a small design up later.
2. Add bleed on all edges. A common standard is 3 mm (0.125 in.), but confirm your printer's specification.
3. Keep critical elements inside the safe zone. Keep text and logos at least 3 mm from the trim edge. [aura-print]
4. Use CMYK color mode. RGB colors can shift when converted for offset or digital printing.
5. Use vector files for logos and text. Adobe Illustrator AI, PDF, or EPS files are preferred; supply fonts as outlines when required.
6. Use high-resolution images. Print guidance commonly recommends at least 300 dpi for raster images. [psprint]
7. Create separate layers for foil, embossing, spot UV, and die-cut lines. Label them clearly.
8. Include a physical mock-up. Print a sample, punch the hole, attach it to the product, and check readability under store lighting.
Manufacturer insight: Always request a printed proof before mass production if the tag uses metallic ink, foil, dark backgrounds, small type, or a QR code. Screen previews cannot accurately show paper texture, ink density, foil alignment, or scanning performance.
Avoid Common Hang Tag Design Mistakes
Many hang tags fail not because they lack creativity, but because they ignore real-world use.
Avoid these issues:
- Too much text: Move long product stories to packaging, inserts, or a QR-code landing page.
- Small type: Body text below 8 pt can become difficult to read on a small tag. [aura-print]
- Poor contrast: Light gray text on white paper or dark text on a busy photo reduces legibility.
- Hole through a logo or barcode: This is one of the most expensive and avoidable production errors.
- No barcode quiet zone: Barcode scanners need clear space around the code.
- Low-resolution artwork: Logos and photos can look blurry when printed.
- Ignoring compliance: Fiber content, origin, safety warnings, and care information may be legally required in certain markets.
- No testing on the actual product: A tag that looks good on screen may hang awkwardly, obscure the product, or tear easily.
A Simple Hang Tag Design Workflow
Use this seven-step process for a consistent, production-ready result:
1. Define the goal: Brand awareness, price communication, product education, authentication, or campaign conversion.
2. List required content: Separate "must-have" legal and retail details from optional marketing content.
3. Choose size and orientation: Consider the product, hanging method, and retail display.
4. Design the front: Lead with the logo, product name, and one visual focal point.
5. Organize the back: Group price, barcode, materials, care, and QR-code information into clear sections.
6. Select materials and finishes: Match the tag's tactile quality to the product's price position.
7. Proof and test: Print a sample, attach it to the product, scan the QR code, and check durability.
Sustainability Without Greenwashing
Sustainability can be a powerful hang-tag message, but it must be specific and verifiable. Instead of using vague claims such as "eco-friendly," state exactly what makes the tag or product more sustainable.
Better wording examples include:
- "Printed on FSC-certified paper"
- "Made with 100% post-consumer recycled paper"
- "Soy-based inks"
- "Plastic-free attachment"
- "Scan to view material sourcing details"
- "Recyclable where local facilities accept paper products"
Only make environmental claims you can substantiate with supplier documentation, certification records, or a transparent product page. A QR code is especially useful here because it lets brands provide evidence without overcrowding the tag.
Hang Tag Design Checklist
Before sending artwork to your printer, confirm the following:
- Brand logo is clear and high resolution
- Front has one dominant message
- Back contains all required retail and compliance details
- Barcode and QR code are tested
- Hole position avoids text, logo, barcode, and QR code
- Bleed, trim, and safe-zone margins are correct
- Fonts are outlined or embedded
- Colors are in CMYK
- Special finishes have separate production layers
- Paper stock and attachment method match the product
- A physical sample has been approved
Conclusion
Designing an effective hang tag requires more than placing a logo on a small piece of card. The best tags combine a clear brand message on the front with practical, scannable, and compliant information on the back. By defining the tag's purpose, choosing the right size and material, planning the hole and attachment early, and preparing accurate print-ready artwork, brands can create hang tags that improve shelf appeal, support retail operations, and strengthen customer trust.
For brands sourcing custom hang tags at scale, work with a printing partner that can advise on paper selection, finishing, barcode placement, die-cutting, and pre-production samples. XingKun provides custom hang tag design and printing services for brands, wholesalers, and product manufacturers worldwide. [pryntco]
Ready to create custom hang tags for your products? Contact XingKun for a tailored quotation, material recommendation, and print-ready artwork support.
FAQ
1. What information should a hang tag include?
At minimum, include your logo, product name, price if needed, barcode or QR code, size or SKU, material information, and country of origin where required. For apparel, check the destination market's rules on fiber content, origin, manufacturer identification, and care labeling. [ftc]
2. What is the best size for a clothing hang tag?
A common clothing hang-tag size is approximately 2 × 3.5 inches, but the best size depends on the garment, brand style, and required information. Larger tags work better for storytelling, while smaller tags suit minimalist or lightweight products. [4over4]
3. Should a hang tag be single-sided or double-sided?
Double-sided is usually better for retail products. Use the front for branding and the back for price, barcode, product details, care information, and QR-code access.
4. Where should the hole be placed on a hang tag?
Place the hole before finalizing artwork, usually near the top edge and centered for a vertical tag. Keep a clear margin around the hole so the attachment does not cover or damage important design elements. [pryntco]
5. Can a QR code replace a barcode on a hang tag?
Not always. A QR code is useful for marketing, authentication, and product information, while a retail barcode may still be required for point-of-sale scanning. GS1 guidance suggests keeping the conventional EAN/UPC barcode in its usual position and placing a 2D code elsewhere on the tag. [gs1]
6. What paper is best for premium hang tags?
Thick coated art paper works well for vivid color and premium retail presentation. For a natural or sustainable brand image, choose uncoated, recycled, or kraft paper. The right choice depends on your printing method, finish, budget, and brand positioning.
References
1. Federal Trade Commission — [Threading Your Way Through the Labeling Requirements Under the Textile and Wool Acts]
2. Federal Trade Commission — [Clothing and Textiles]
3. GS1 — [2D Symbol Placement Guidelines]
4. GS1 Sweden — [2D Barcodes at Retail POS: Getting Started Guide]
5. PsPrint — [Hang Tag Design Essentials]
6. 4OVER4 — [How Do You Make Hang Tags for Clothing?]
7. 4OVER4 — [What Are Hang Tags? Uses, Types & Design Tips]
8. Pryntco — [Custom Hang Tag Printing Guide for Retail]
9. Aura Print — [Custom Clothing Tags: Design Guide for Brands]
10. XingKun — [Custom Hang Tag Design and Printing]


